VPN Pieces – Learn how to enable a VPN kill switch to keep your internet activity private and secure, even if your VPN connection suddenly drops. Simple steps, no tech jargon—just straight-up protection.
Have you ever been happily browsing with your VPN on, thinking you’re totally invisible, and then boom—your connection drops without warning? It happens more often than you’d think. And when it does, your real IP address and online activity can be exposed in seconds.
That’s exactly why a VPN kill switch exists. It’s like a safety net for your privacy. When enabled, it automatically cuts off your internet connection if the VPN goes down, making sure nothing slips through the cracks.
In this detailed guide, we’ll explore how to enable VPN kill switch across different devices and platforms, why it matters, and best practices to enhance our online security.
In this article, we’ll also dive into the technical aspects, provide real-world examples, and offer actionable steps. Whether we’re seasoned VPN users or just starting out, understanding and implementing a VPN kill switch can greatly enhance our privacy toolkit.
Table of Contents
ToggleWhat Is a VPN Kill Switch and Why Do We Need One?
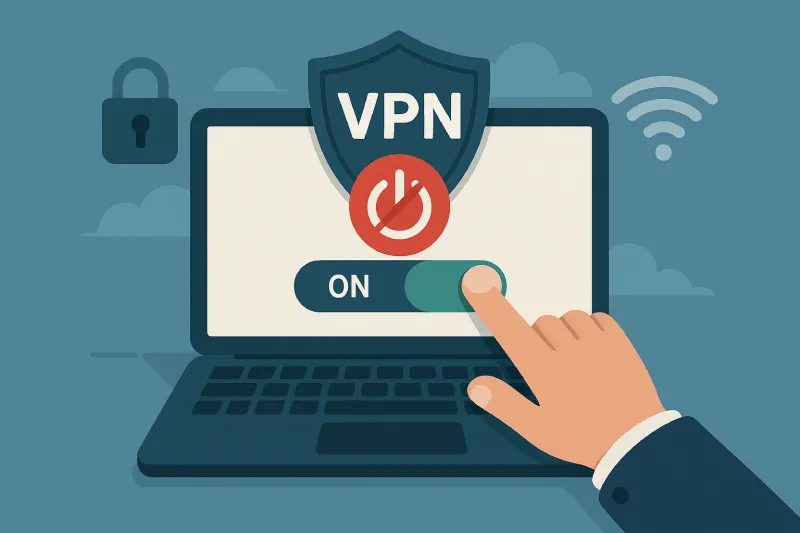
A VPN kill switch, also known as an internet kill switch, is a security feature that prevents our device from accessing the internet if the VPN connection drops. Without it, even a brief VPN disconnection could reveal our real IP address and online activity.
Why do we need a VPN kill switch? Because VPN connections can occasionally fail—due to server overload, network instability, or software errors. When this happens, our internet traffic would default back to the unsecured ISP connection. This exposes our personal data, browsing habits, and location to third parties.
Benefits of Using a VPN Kill Switch
- Prevents IP leaks by blocking all non-VPN traffic.
- Protects sensitive activities like banking, P2P file sharing, and private communication.
- Maintains anonymity even during unstable connections.
- Ensures compliance with privacy regulations for businesses.
According to a 2024 report by Cybersecurity Ventures, 81% of VPN users value the kill switch feature as essential for securing their online activity.
How Does a VPN Kill Switch Work?
Understanding the mechanics of a VPN kill switch helps us appreciate its importance. A VPN kill switch monitors the VPN connection status in real-time. If it detects a disconnection:
- It triggers firewall rules or system-level commands.
- These block outgoing and incoming internet traffic.
- The block remains active until the VPN connection is restored or the VPN app is closed.
“A VPN kill switch acts as a digital bodyguard—guarding the gates and locking them down instantly when a threat is detected,” says cybersecurity expert Jenna McConnell from Privacy Today.
Common Kill Switch Types
- System-Level Kill Switch: Blocks all internet access system-wide.
- Application-Level Kill Switch: Blocks traffic only for specified apps.
- Dynamic Kill Switch: Adapts to changing VPN server IPs and network environments.
Read More : How to Use VPN for Mobile Legends for Reduce Lag
Why Enabling a VPN Kill Switch Is Critical for U.S. Users
We in the United States face specific privacy challenges that make VPN kill switches invaluable:
- ISP tracking: ISPs in the U.S. can legally track and sell browsing data.
- Frequent surveillance: Government programs often monitor digital communications.
- Data-hungry corporations: Online giants collect extensive personal data.
By learning how to enable VPN kill switch, we can maintain a shield against these invasive practices.
Read More : How to Choose the Best VPN for Your Needs
VPN Kill Switch Setup: General Steps
While the exact process varies by provider, most VPNs follow a similar pattern for activating their kill switch.
1. Launch the VPN Application
Start by opening the VPN app on our device. Ensure we’re using the latest version, as updates often enhance kill switch functionality.
2. Navigate to Settings
Look for the Settings, Preferences, or Options menu. This is typically represented by a gear icon.
3. Enable the Kill Switch Feature
Locate the Kill Switch, Network Lock, or Internet Kill Switch setting. Turn it on. Some providers allow us to choose between system-level and app-level protection.
4. Save and Test
Save the settings and test by disconnecting the VPN manually to ensure traffic is blocked as expected.
How to Enable VPN Kill Switch on Windows
Activating a VPN kill switch on Windows is straightforward with most leading VPN apps.
Example: NordVPN on Windows
- Open NordVPN.
- Go to Settings → Kill Switch.
- Toggle Internet Kill Switch ON for full system protection.
- Optional: Add apps to App Kill Switch if selective blocking is desired.
Pro Tip: Always perform a test by disconnecting the VPN while trying to load a webpage. If the page doesn’t load, the kill switch is working.
How to Enable VPN Kill Switch on macOS
VPN kill switches are equally crucial on macOS, especially for professionals handling sensitive data.
Example: ExpressVPN on macOS
- Open ExpressVPN.
- Navigate to Preferences → General tab.
- Check Stop all internet traffic if the VPN disconnects unexpectedly.
- Confirm settings and test functionality.
ExpressVPN’s kill switch is called Network Lock and is highly reliable.
How to Enable VPN Kill Switch on Android
Mobile devices are prime targets for surveillance and data leaks.
Example: Surfshark on Android
- Open Surfshark app.
- Tap Settings → VPN Settings.
- Enable Kill Switch.
- Optional: Configure Bypass VPN for trusted apps.
Android 10 and later also offer native kill switch capabilities for always-on VPNs in system settings.
How to Enable VPN Kill Switch on iOS
iOS has certain restrictions, but many VPN apps still offer effective kill switch functionality.
Example: ProtonVPN on iOS
- Open ProtonVPN app.
- Go to Settings → VPN Settings.
- Enable Always-On VPN with Kill Switch.
- Confirm that no traffic flows outside the VPN.
Note: Apple’s iOS uses Network Extension APIs, making app-based kill switches more reliable than third-party system tools.
VPN Kill Switch Configuration: Best Practices
To optimize the use of a VPN kill switch, we should follow some best practices:
- Always test the kill switch after activation.
- Use system-level kill switches for full protection.
- Avoid public Wi-Fi without a kill switch enabled.
- Keep VPN apps updated to patch potential vulnerabilities.
- Combine kill switch with split tunneling to control app-specific traffic.
Stat: According to VPN Usage Survey 2025 by Statista, 70% of advanced VPN users in the U.S. configure a kill switch for daily use.
VPN Kill Switch Security: Real-World Implications
A VPN kill switch protects against several common threats:
- Wi-Fi instability in public places.
- VPN server crashes during streaming.
- Unexpected OS updates causing VPN dropouts.
- ISP attempts to hijack connections.
Case Study: In 2024, a major U.S. tech journalist reported how a kill switch prevented a personal data leak while traveling through airports with unstable Wi-Fi.
Potential Challenges When Using VPN Kill Switches
While highly effective, kill switches can sometimes introduce inconveniences:
- Blocked access to trusted LAN devices (printers, smart home gadgets).
- Temporary loss of connectivity during VPN server switches.
- Compatibility issues with certain corporate VPNs.
Solution: Many VPNs allow customizable VPN kill switch settings to exclude local networks or trusted apps.
Comparing VPN Providers: Kill Switch Feature Availability
| VPN Provider | Kill Switch Feature | Type | Platforms |
|---|---|---|---|
| NordVPN | Yes | System & App | Windows, macOS, Android, iOS |
| ExpressVPN | Yes (Network Lock) | System | Windows, macOS, Linux |
| Surfshark | Yes | System & App | Windows, macOS, Android, iOS |
| ProtonVPN | Yes | Always-On VPN | Windows, macOS, Android, iOS |
| CyberGhost | Yes | App-Level | Windows, macOS, Android |
Stat: Over 90% of premium VPNs offer some form of kill switch, but only 65% provide system-wide blocking.
VPN Kill Switch Tutorial for Beginners
If we’re new to VPNs, here’s a simplified VPN kill switch tutorial:
- Choose a VPN with a robust kill switch (refer to table above).
- Install the VPN on desired devices.
- Enable the kill switch during initial setup.
- Run connectivity tests using tools like ipleak.net.
- Use the VPN kill switch daily, especially on public networks.
How to Activate Kill Switch on VPN for Corporate Environments
Corporate users have unique requirements when setting up VPN kill switches:
- Use enterprise-grade VPNs that support Group Policy configurations.
- Implement script-based enforcement to prevent employees from bypassing the kill switch.
- Test across varied network setups (remote work, office VPN, BYOD).
Quote: “For companies handling sensitive intellectual property, a VPN kill switch is non-negotiable,” says cybersecurity consultant Raj Patel.
VPN Kill Switch Settings to Enhance Privacy
Advanced users can tweak VPN kill switch settings for maximum protection:
- Enable IPv6 leak protection alongside the kill switch.
- Configure DNS servers to avoid leaks during VPN drops.
- Use double VPN chains for layered kill switch functionality.
Steps to Enable VPN Kill Switch on Routers
Routers present a special case for VPN kill switches:
- Use firmware like DD-WRT, OpenWRT, or Tomato.
- Configure firewall rules to block all traffic outside the VPN tunnel.
- Test with VPN watchdog scripts for automated monitoring.
Pro Tip: Not all routers support native kill switches—choose hardware accordingly.
VPN Kill Switch for Anonymity and Freedom of Speech
Activists, journalists, and privacy advocates rely on VPN kill switches to maintain:
- Anonymity when bypassing censorship.
- Safe communications on hostile networks.
- Secure connections for whistleblowing activities.
The Freedom of the Press Foundation recommends using VPN kill switches as part of operational security (OpSec) best practices.
Conclusion
Understanding how to enable VPN kill switch empowers us to take control of our online privacy. Whether browsing at home, working remotely, or accessing sensitive information, a properly configured VPN kill switch protects us from unwanted exposure.
By choosing a VPN with a strong kill switch, configuring it carefully, and adopting best practices, we create a robust privacy shield. As online threats continue to evolve, mastering VPN kill switch configuration is a critical step toward a safer digital life.
Key Takeaways
- A VPN kill switch blocks internet traffic if the VPN disconnects.
- It prevents IP leaks, maintains anonymity, and protects sensitive data.
- Enabling the kill switch varies by platform and VPN provider.
- Testing and best practices ensure maximum security.
- Corporate and privacy-focused users benefit significantly from advanced configurations.