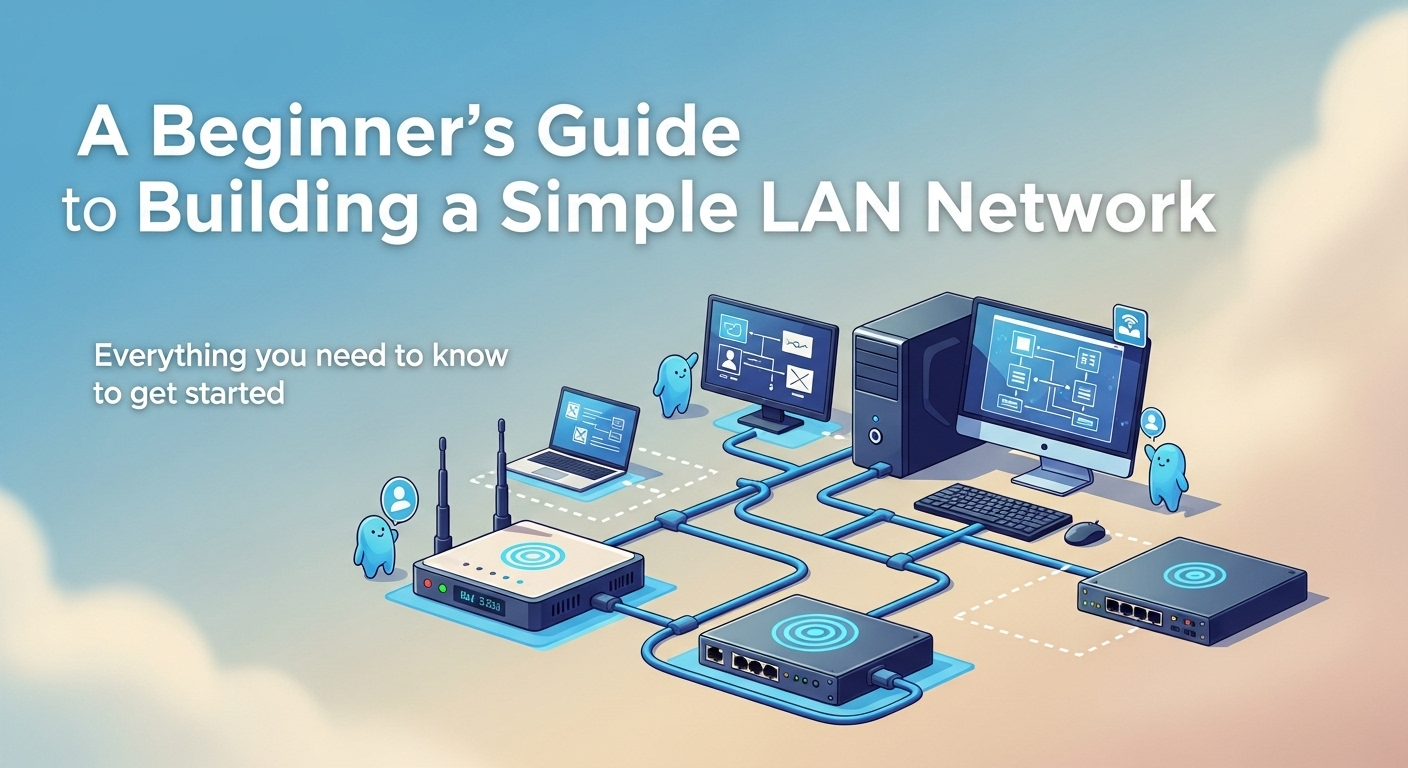
Building your own home or small office network might sound like a task reserved for IT professionals, but it's more accessible than you think. With a little guidance and the right components, anyone can create a fast, stable, and secure Local Area Network (LAN). A well-built LAN is the backbone of modern connectivity, enabling everything from seamless file sharing and online gaming to streaming high-definition media across multiple devices. This guide is designed to demystify the process and provide clear, step-by-step instructions. By the end of this article, you will have a comprehensive understanding of how to build a simple LAN network from scratch, empowering you to take full control of your digital environment.
What is a LAN and Why Should You Build One?
At its core, a Local Area Network (LAN) is a collection of connected devices within a limited geographical area, such as a home, school, or office building. Think of it as your own private digital ecosystem. This is in contrast to a Wide Area Network (WAN), like the internet itself, which connects devices over vast distances. Your LAN connects to the internet (a WAN) through a device called a router, which acts as a gateway. Building your own LAN provides a foundational layer of control, security, and performance that relying solely on a single, provider-issued Wi-Fi box might not offer.
The benefits of a dedicated LAN are numerous and tangible. It facilitates high-speed communication between your devices without needing to send data out to the internet and back. This is perfect for transferring large files between computers, streaming media from a local storage device (like a NAS) to your smart TV, or setting up a shared printer that everyone in the household can use. For gamers, a wired LAN connection provides the lowest possible latency (ping), which is crucial for competitive online gaming. Furthermore, it allows for centralized data backups, ensuring all your important files are safely stored in one place.
While the term "network" can conjure images of complex server rooms, a simple LAN is surprisingly straightforward. For a home or small office, your network will typically consist of a router, some cables, and the devices you want to connect, such as computers, printers, and gaming consoles. The goal is not to build a corporate-level infrastructure but to create a robust and reliable system that meets your daily needs. This guide focuses on this simple, practical approach, ensuring the project remains manageable, affordable, and highly effective.
Gathering Your Essential Equipment: The Building Blocks of Your Network
Before you can connect anything, you need to gather the necessary hardware. Think of these components as the fundamental building blocks of your network. Selecting the right equipment is crucial for ensuring stability, speed, and future-proofing your setup. While there's a vast array of networking gear available, a simple home LAN only requires a few key pieces. It's important to understand the role of each component to make informed decisions.
This section will break down the essential hardware you'll need. We'll cover the function of each device, what features to look for, and why certain components are recommended for beginners. Don't be intimidated by the terminology; we'll explain everything in simple terms. The goal is to equip you with the knowledge to either use what you have effectively or purchase new gear with confidence. A small investment in the right hardware now can save you from countless headaches related to slow speeds and unreliable connections later.
For a basic but powerful LAN, you’ll focus on four main categories: the router (the brain), the cables (the nervous system), an optional switch (for expansion), and your end devices (the nodes). Understanding how these elements work together is the first major step toward building a successful network.
The Network Router: Your LAN's Traffic Controller
The router is the single most important component of your LAN. It serves two primary functions. First, it acts as a switch, allowing all the devices within your network to communicate with each other. Second, it acts as a router, directing traffic between your local network and the wider internet. It's the central hub and the gateway, managing all data flow. Most modern consumer routers are integrated devices that also include a built-in Wi-Fi access point, allowing both wired and wireless devices to join the network.
When choosing a router, there are several key features to consider. Look for a model that supports modern Wi-Fi standards, such as Wi-Fi 6 (802.11ax), which offers better performance, efficiency, and speed in device-dense environments compared to older standards like Wi-Fi 5 (802.11ac). Also, check the number of Gigabit Ethernet ports. Most routers come with four LAN ports, which might be enough for a small setup. For security, ensure the router supports the WPA3 encryption protocol, which is the current standard for securing wireless networks.
Network Cables (Ethernet): The Physical Connection
While Wi-Fi is convenient, a wired connection via an Ethernet cable remains the gold standard for speed and reliability. For stationary devices like desktop PCs, smart TVs, game consoles, and network-attached storage (NAS) drives, a wired connection is highly recommended. Ethernet cables come in different categories, but for a simple home network, you'll most likely encounter Cat 5e and Cat 6.
Cat 5e cables are capable of supporting speeds up to 1 Gigabit per second (Gbps), which is sufficient for most home internet plans and internal network tasks. Cat 6 cables can support up to 10 Gbps over shorter distances and offer better protection against crosstalk and interference. For a new build, opting for Cat 6 cables is a wise, future-proof choice as they are only slightly more expensive than Cat 5e. You will need cables to connect your modem to your router, and your router to your wired devices.
Network Switch (Optional but Recommended for Expansion)
A network switch is a simple device that expands the number of available Ethernet ports on your network. Think of it as a power strip for your LAN. Your router typically has a limited number of LAN ports (usually four). If you have more wired devices than available ports on your router, a switch is the solution. You simply connect the switch to one of the router's LAN ports, and you instantly have more ports to use (a 5-port switch will add 4 usable ports, an 8-port switch will add 7, and so on).
For a beginner's setup, you'll want an unmanaged switch. These are true plug-and-play devices that require no configuration whatsoever. You just plug them in, connect your devices, and they start working immediately. Managed switches offer advanced features for network customization but are overly complex and unnecessary for a simple home LAN. An unmanaged Gigabit switch is an inexpensive and incredibly useful tool for expanding the physical capacity of your network.
The Devices (Nodes): Your Computers and Peripherals
The final components are the devices, or "nodes," that you will be connecting to your network. This includes a wide range of electronics:
- Desktop Computers and Laptops
- Printers and Scanners
- Smart TVs and Streaming Media Players
- Gaming Consoles (PlayStation, Xbox, Nintendo Switch)
- Network Attached Storage (NAS) drives for centralized file storage
- Smart Home Hubs
Virtually all modern devices that are designed to connect to a network come with a built-in Network Interface Card (NIC). For wired connections, this is the Ethernet port. For wireless connections, it's the internal Wi-Fi adapter. You generally don't need to worry about buying a separate NIC unless you have a very old desktop computer or a specific high-speed networking need.
Step-by-Step Guide to Physical Setup and Connection
With your equipment gathered, it's time for the hands-on part: physically setting up your network. This process is logical and sequential. The key is to be methodical and ensure each connection is secure. Before you begin, it’s a good idea to choose a central, open location for your router. Placing it in a cabinet or at the far end of your house can significantly weaken its Wi-Fi signal. A central location provides the most even wireless coverage throughout the area.
This phase is all about making the correct physical connections between your modem, router, switch (if you're using one), and end devices. It doesn’t require any software configuration yet—that comes next. Pay attention to the different types of ports on your router. The port for connecting to your modem is typically labeled "WAN" or "Internet" and is often a different color. The ports for connecting your local devices are labeled "LAN."
Taking a few moments to plan your cable runs can make the final result much neater. Use the appropriate length of Ethernet cable for each connection to avoid having large, tangled coils of excess wire. Once everything is connected and powered on, you'll see link lights on the router and switch ports, which provide a visual confirmation that a physical connection has been established.
Here is the step-by-step process for connecting everything:
- Position Your Router and Modem: Place your internet modem and your new router near each other and close to a power outlet.
- Connect Modem to Router: Take an Ethernet cable and plug one end into the Ethernet port on your modem. Plug the other end into the WAN (or Internet) port on your router. This is the crucial link that brings the internet into your local network.
- Power Everything On: Plug in the power adapters for both the modem and the router. It's best practice to power on the modem first. Wait for its status lights (often labeled Power, Downstream, Upstream, Online) to become solid, indicating it has established a connection with your Internet Service Provider (ISP). Then, power on the router and wait for its power and status lights to stabilize.
- Connect Your Primary Computer: For initial setup, it's easiest to use a wired connection. Take another Ethernet cable and connect it from any of the LAN ports on your router to the Ethernet port on your primary computer or laptop.
- Connect Other Wired Devices: Use additional Ethernet cables to connect your other wired devices (e.g., game console, smart TV, another PC) to the remaining open LAN ports on the router.
- (If using a switch) Expand Your Ports: If you need more ports, connect an Ethernet cable from a LAN port on your router to any port on your network switch. Then, connect your additional wired devices to the other ports on the switch. The unmanaged switch will handle the traffic automatically.
- Verify Physical Links: Look at the Ethernet ports on your router, switch, and devices. You should see small LED lights, often green or amber. A solid or blinking light indicates a successful physical connection and data activity.
Configuring Your Network Software and Settings
Once the physical connections are in place, the next stage is to configure the software settings of your router. This is where you'll secure your network, name your Wi-Fi, and ensure all your devices can communicate properly. This is all done through the router's web-based administration panel. Accessing this panel is your first step.
To get into your router's settings, open a web browser on the computer you connected via Ethernet cable. In the address bar, you'll type in the router's default IP address. This is most commonly 192.168.1.1, 192.168.0.1, or sometimes a friendly URL like routerlogin.net or tplinkwifi.net. This information is printed on a sticker on the bottom of your router, along with the default username and password.

Once you log in, you'll be greeted by the router's dashboard. Your very first action should be to change the default administrator password. Leaving the default password is a major security risk, as these defaults are widely known. Choose a strong, unique password to prevent unauthorized access to your network settings. After securing access, you can move on to configuring the essential network parameters.
Setting Up Your Wi-Fi Network
In the router's administrative panel, navigate to the "Wireless" or "Wi-Fi" section. Here, you will configure your wireless network's name and password. You will likely see settings for both 2.4 GHz and 5 GHz bands. The 2.4 GHz band offers a longer range but slower speeds, while the 5 GHz band provides faster speeds over a shorter range. Most modern routers allow you to use the same network name for both, and the router will intelligently steer devices to the best band.
You need to set the following:
- SSID (Service Set Identifier): This is the name of your Wi-Fi network that you will see when searching for networks on your devices. Change it from the default to something unique and personal. Avoid including personal information in the name.
- Security Protocol: This is critically important. Always choose WPA3-Personal if it's available, as it is the most secure standard. If WPA3 is not an option, select WPA2-Personal (with AES encryption). Never use older, insecure options like WEP or WPA.
- Password/Pre-Shared Key: This is the password you will use to connect to your Wi-Fi. Create a strong password that is at least 12 characters long and includes a mix of uppercase letters, lowercase letters, numbers, and symbols.
Configuring IP Addresses (DHCP)
An IP address is a unique numerical label assigned to each device on a network, allowing them to be identified and communicate with each other. Manually assigning a unique IP address to every device is tedious and prone to error. Fortunately, all consumer routers have a feature called DHCP (Dynamic Host Configuration Protocol) that handles this automatically.
When a device connects to your network, it asks the DHCP server (your router) for an IP address. The router then assigns an available IP from a predefined range (e.g., 192.168.1.2 to 192.168.1.254). For any simple LAN build, your best course of action is to ensure that DHCP is enabled on your router. It is enabled by default on virtually all consumer routers, so you likely won't need to change anything here. This "plug and play" IP assignment is what makes adding new devices to your network so seamless.
Setting Up File and Printer Sharing
One of the main advantages of a LAN is the ability to easily share files and printers between computers. This configuration is not done on the router but on the operating system of each computer (e.g., Windows or macOS). For devices to see each other on the network, they need to be on the same "workgroup" or network profile.
In Windows, when you first connect to your new network, you will be prompted to choose a network profile. Select "Private". This profile tells Windows that you are on a trusted network (like your home or office) and automatically enables network discovery and file/printer sharing features. You can then go into your sharing settings to specify exactly which folders or printers you want to make available to other users on the LAN. On macOS, you can enable file and printer sharing in System Settings > Sharing.
Testing and Troubleshooting Your New LAN
After completing the physical setup and software configuration, the final step is to test your network to ensure everything is working correctly. This involves checking both internet connectivity and local network communication. Don't worry if something doesn't work perfectly on the first try; troubleshooting network issues is often a simple process of elimination.
Start by testing the most basic function: internet access. On both your wired and wireless devices, try to browse to a few different websites. If the pages load, you have successfully connected your LAN to the internet. Next, test local connectivity. A great tool for this is the `ping` command. Open the Command Prompt (in Windows) or Terminal (in macOS) on one computer and try to ping the IP address of another computer on the network. A successful ping will receive a series of replies, confirming that the two devices can communicate.
If you run into issues, a systematic approach is best. Most problems are caused by simple mistakes like a loose cable or a mistyped password. Always start by checking the physical layer: are the cables plugged in securely? Are the link lights on? From there, you can move to software settings. Rebooting your router and computer can also resolve a surprising number of temporary glitches.
Troubleshooting Common LAN Issues
The following table outlines some common problems you might encounter and how to solve them.
| Symptom | Possible Cause(s) | Solution(s) |
|---|---|---|
| No Internet on Any Device | Modem has no internet service; Modem-to-Router cable is loose or faulty. | Check modem status lights. Reboot the modem, wait 2 minutes, then reboot the router. Check/replace the WAN cable. |
| One Wired Device Cannot Connect | Faulty Ethernet cable; Device's network driver issue. | Try a different Ethernet cable. Try a different port on the router/switch. Update the network drivers on the device. |
| Cannot Connect to Wi-Fi | Incorrect password; Too far from the router. | Double-check and re-enter the Wi-Fi password. Move closer to the router. Reboot the router. |
| Slow Wi-Fi Performance | Signal interference; Outdated router firmware. | Move the router to a more central location. Change the Wi-Fi channel in router settings. Update the router's firmware. |
| Cannot See Other Computers on the Network | Network profile is set to "Public"; Firewall is blocking discovery. | Change the network profile on your computer to "Private". Temporarily disable the firewall to test, then create rules. |
Frequently Asked Questions (FAQ) about Building a LAN
Q1: What is the difference between a modem and a router?
A: A modem (modulator-demodulator) is a device that connects your home to your Internet Service Provider (ISP) via a cable or phone line. It converts the signal from your ISP into a digital signal that one device can use. A router is a device that takes that single internet connection and shares it among multiple devices, creating your Local Area Network (LAN). Most routers also include Wi-Fi and act as a firewall.
Q2: Can I have both wired and wireless devices on the same simple LAN?
A: Absolutely. This is called a hybrid network and is the most common setup for homes and small offices. Your router manages communication between all connected devices, regardless of whether they are connected via an Ethernet cable or Wi-Fi. They will all be part of the same LAN and can share resources like files and printers.
Q3: Do I really need a network switch?
A: You only need a network switch if you run out of LAN ports on your router. If you have, for example, a desktop PC, a game console, a smart TV, and a NAS drive (four devices) and your router has four LAN ports, you don't need a switch. However, if you wanted to add a fifth wired device, you would need a switch to expand your port capacity. They are an inexpensive and easy way to scale up your wired network.
Q4: What is the best Ethernet cable to use for a home network?
A: For most home networking needs, a Cat 6 cable is the best choice. It provides excellent performance for Gigabit speeds and is well-shielded against interference. While Cat 5e will also work for Gigabit speeds, Cat 6 offers more headroom for future technologies and is only marginally more expensive, making it a better long-term investment.
Q5: How can I make my new LAN more secure?
A: The three most important security steps for a simple LAN are: 1) Change the default administrator password on your router. 2) Use WPA3 or WPA2-AES encryption for your Wi-Fi network. 3) Use a strong, unique password for your Wi-Fi. Additionally, keeping your router's firmware updated is crucial, as updates often contain important security patches.
Conclusion
Congratulations! You now have the knowledge and a clear roadmap for how to build a simple LAN network. We've journeyed from understanding the fundamental concepts and benefits of a LAN to selecting the right equipment, connecting it all physically, configuring the essential software settings, and finally, testing your new network. By creating your own LAN, you have built a powerful foundation for your home or office's digital life, enabling faster speeds, greater reliability, and enhanced security.
The process is far less daunting than it first appears. With a logical approach and a little patience, you can create a network that supports all your devices and activities, from high-stakes online gaming to seamless media streaming and efficient file sharing. Remember that the network you've built is not just a utility but an asset that you can manage and expand as your needs grow. You are now in control of your own local network.
***
Article Summary
This guide provides a comprehensive, step-by-step walkthrough for beginners on how to build a simple Local Area Network (LAN). It begins by defining a LAN and outlining its benefits, such as high-speed file sharing, stable gaming connections, and centralized printer access. The article then details the essential hardware required for the project, including the central role of the router, the importance of quality Ethernet cables (Cat 6 recommended), the optional but useful network switch for expansion, and the various devices (nodes) that will connect to the network.
The core of the guide is broken into a physical setup section and a software configuration section. The physical setup provides a clear, numbered list of instructions for connecting the modem, router, and devices in the correct sequence. The software configuration section explains how to access the router's admin panel, change the default password, and critically, how to set up a secure Wi-Fi network with a unique SSID and strong WPA3/WPA2 encryption. It also explains the function of DHCP for automatic IP address assignment and provides guidance on enabling file sharing within the operating system.
Finally, the article includes a practical troubleshooting table to help users solve common issues like connectivity loss and slow speeds. It is supplemented by an FAQ section that answers frequent beginner questions about modems vs. routers, mixing wired/wireless devices, and network security. The guide concludes by empowering the reader, reinforcing that they now possess the skills to build, manage, and troubleshoot their own efficient and reliable home network.