
What to do after a personal data breach is crucial for minimizing damage and restoring trust. A data breach can compromise sensitive information, lead to financial loss, and harm an organization’s reputation. Prompt action not only mitigates risks but also ensures compliance with legal requirements and maintains customer confidence. This article provides a comprehensive guide to the essential steps you should take following a personal data breach, covering everything from immediate response to long-term prevention. By following these strategies, businesses can effectively manage the aftermath of a data incident and safeguard their digital assets. Immediate Response: Contain the Breach When a personal data breach is detected, the first step is to contain it as quickly as possible. Containment involves identifying the source of the breach, isolating affected systems, and preventing further unauthorized access. This action is vital to limit the exposure of sensitive data and reduce the potential impact on the organization. For instance, if a hacker has accessed a database, shutting down the compromised system or segmenting it from the network can stop the leak from spreading. Containment should be executed with precision and speed. Time is a critical factor in data breach response; the longer a breach remains undetected, the more data is at risk. Organizations must immediately investigate the breach to determine its nature and extent. This could involve checking security logs, analyzing system vulnerabilities, or using intrusion detection tools. The goal is to pinpoint the entry point and take swift action to secure it. A well-prepared response plan is essential for effective containment. This plan should outline protocols for identifying and isolating the breach, communicating with internal teams, and engaging external experts. Containment efforts must also prioritize protecting the data that has already been compromised, such as encrypting files or removing access for unauthorized users. 1 Contain the Breach Quick containment is the foundation of a successful data breach response. Without immediate action, the breach can escalate, leading to greater financial and reputational damage. Organizations should first isolate the affected systems to prevent further data leakage. This might involve disconnecting compromised devices from the network or restricting access to sensitive areas. Containment strategies vary depending on the breach type. For example, if the breach involves a phishing attack, resetting passwords and disabling compromised accounts can prevent further access. In cases of a malware infection, running antivirus scans and patching vulnerabilities is critical. The key is to act decisively while gathering enough information to understand the full scope of the incident. A containment team should be established immediately. This team typically includes IT staff, security experts, and legal advisors to ensure that all aspects of the breach are addressed simultaneously. Their responsibilities may include shutting down affected systems, blocking malicious IP addresses, and documenting the initial steps taken to contain the breach. 2 Assess the Scope of the Breach Once the breach is contained, the next step is to assess the scope of the incident. This involves determining how much data was exposed, which systems were affected, and the potential consequences. A thorough assessment helps organizations understand the severity of the breach and allocate resources accordingly. For instance, if customer credit card details were compromised, the financial implications could be significant, requiring a different response strategy than a breach involving employee emails. Assessing the breach requires a detailed analysis of the data involved and the pathways through which it was accessed. This step often involves reviewing system logs, conducting forensic investigations, and identifying any internal or external factors that contributed to the breach. It is also important to determine whether the breach is isolated or part of a larger attack, such as a ransomware operation or a coordinated cyber assault. The assessment should be comprehensive and data-driven. Tools like data loss prevention software, network monitoring systems, and threat intelligence platforms can provide valuable insights. By categorizing the data types involved and evaluating the risk to individuals, organizations can prioritize their response efforts and prepare for the next steps. 3 Activate the Response Team Activating a dedicated response team is essential for a coordinated effort. This team should include individuals with expertise in cybersecurity, legal compliance, public relations, and internal operations. Their role is to manage the breach response, communicate with stakeholders, and ensure that all actions are aligned with the organization’s objectives. For example, the legal team may need to prepare breach notifications, while the PR team focuses on maintaining public trust. The response team must have clear roles and responsibilities to avoid confusion during the crisis. A cybersecurity specialist will lead the technical investigation, a legal advisor ensures compliance with regulations, and a communications manager handles messaging to customers, employees, and regulators. Internal teams, such as IT and customer support, should also be involved to address immediate operational concerns. Effective team activation requires pre-established protocols and communication channels. Regular meetings, shared dashboards, and real-time updates are crucial for keeping everyone informed. The team should also be equipped with the necessary tools and resources to carry out their tasks efficiently, such as access to incident response software or legal templates for notifications. Notify Affected Parties After containing the breach, the next critical step is to notify affected parties. Timely communication helps build trust, ensures transparency, and allows individuals to take necessary actions to protect themselves. Businesses should identify who is impacted and provide clear, concise information about the breach, its cause, and the steps being taken to resolve it. Identifying the affected parties is the first step in effective communication. This includes customers, employees, and business partners who may have their data compromised. Organizations should also determine which internal teams need to be informed, such as IT, legal, and HR departments. The goal is to ensure that all stakeholders receive the appropriate level of detail based on their role and the potential impact on them. Communication should be both prompt and detailed. Delaying notifications can increase the risk of further damage and erode customer confidence. Businesses should use multiple channels to reach affected individuals, such as
How to Build Your Own VPN Server: Secure Your Data Step by Step
How to Build Your Own VPN Server: Secure Your Data Step by Step In today’s digital age, data security has become a top priority for individuals and businesses alike. How to build your own vpn server is a powerful way to take control of your online privacy and ensure that your sensitive information remains protected from prying eyes. Whether you're looking to bypass geographical restrictions, secure your home network, or create a private tunnel for your organization, building a personal VPN server is a cost-effective and customizable solution. This article will guide you through the process of setting up your own how to build your own vpn server step by step, covering everything from choosing the right hardware to maintaining your setup for optimal performance. By the end, you’ll have a fully functional secure network that works for your specific needs. — H2: Understanding the Basics of a VPN Server Before diving into the technical setup, it’s essential to grasp what a VPN server actually is and how it contributes to data security. A VPN server (Virtual Private Network server) acts as an intermediary between your device and the internet, encrypting your data and masking your IP address to provide anonymity. Unlike commercial how to build your own vpn server services, building your own allows you to tailor the configuration to your requirements, such as choosing encryption protocols, bandwidth limits, or user authentication methods. H3: What is a VPN Server? A VPN server is a system that establishes a secure connection over the internet using encryption technology. When you connect to a VPN server, your data is routed through its network, making it difficult for hackers or third-party entities to track your online activities. This is particularly useful for users who want to protect their data while using public Wi-Fi or accessing restricted content. H3: Why Build Your Own? There are several reasons why setting up a how to build your own vpn server might be the better choice. First, it offers customization—you can choose the software, protocols, and features that suit your specific needs. Second, it provides cost savings, as you avoid monthly subscription fees for commercial services. Third, it gives you full control over your network, allowing you to monitor traffic, set up user roles, and even manage multiple devices. Finally, it’s a great learning tool, helping you understand networking fundamentals and security practices. — H2: Choosing the Right Hardware for Your VPN Server Selecting the appropriate hardware is a critical first step in building your own how to build your own vpn server. The performance and security of your VPN server depend heavily on the components you choose, so it’s important to evaluate your needs and budget carefully. H3: 1. Hardware Requirements To set up a how to build your own vpn server, you’ll need a reliable computer or server with sufficient processing power, memory, and storage. While a basic setup can work with a low-end PC, a more robust system is recommended for handling multiple users and heavy traffic. Key hardware components include a CPU (preferably multi-core for multitasking), RAM (at least 2GB for lightweight use or 8GB for advanced configurations), and storage (SSD drives are ideal for faster data access). Additionally, you'll need a stable internet connection to ensure smooth data transfer. H3: 2. Server Type Selection You can use either a dedicated server or a cloud-based server for your how to build your own vpn server. A dedicated server offers better performance and control, making it ideal for businesses or users with high traffic demands. On the other hand, cloud-based servers (like those from AWS or DigitalOcean) are cost-effective and easy to scale, making them a popular choice for personal use. Consider your usage patterns—if you’re planning to support 10 users or more, a dedicated server might be more suitable. For casual use, a cloud-based solution with shared resources is often sufficient. H3: 3. Location and Connectivity The physical location of your how to build your own vpn server can impact performance and latency. If you're setting up a server for local use, placing it in your home or office network ensures minimal delays. However, if you're creating a how to build your own vpn server for remote access, a server hosted in a data center with high-speed internet connections is better. Location also affects geo-restriction bypassing—servers in different regions can help you access content from specific countries. — H2: Installing the Software to Set Up Your VPN Server Once you’ve selected the right hardware, the next step is installing the software that will turn your system into a how to build your own vpn server. The choice of software depends on your operating system, performance needs, and desired features. H3: 1. Selecting an Operating System The operating system (OS) you choose will influence the software options available and the overall performance of your how to build your own vpn server. Popular choices include Linux distributions like Ubuntu or CentOS, which are lightweight and offer extensive customization. Windows is also a viable option, though it may require more resources. For a secure and scalable setup, Linux is often recommended due to its stability and open-source nature. H3: 2. Choosing a VPN Protocol Selecting the right VPN protocol is crucial for balancing speed, security, and compatibility. Common protocols include OpenVPN, WireGuard, IKEv2/IPsec, and L2TP/IPsec. OpenVPN is known for its strong security and flexibility, while WireGuard is praised for its simplicity and speed. IKEv2/IPsec offers robust encryption and is ideal for mobile users. WireGuard is currently a top recommendation due to its modern architecture and efficiency, but the best choice depends on your specific use case. H3: 3. Initial Software Installation After selecting your OS and protocol, you’ll need to install the necessary software. For OpenVPN, this involves downloading the OpenVPN Access Server or OpenVPN Connect client. For WireGuard, you can install the WireGuard Tunnel or WireGuard Daemon. The installation process typically includes downloading the software, configuring it, and setting up user credentials. It’s important
Cybersecurity Tips for Small Business Owners: Keep Your Data Safe
Cybersecurity Tips for Small Business Owners: Keep Your Data Safe In today’s digital-first world, cybersecurity tips for small business owners are more critical than ever. Cyberattacks are no longer limited to large corporations; small businesses are equally vulnerable, often with less resources to defend against threats. From phishing scams to ransomware attacks, the risks are growing, and the consequences can be devastating. Protecting your data isn’t just about avoiding financial loss—it’s about safeguarding your reputation, customer trust, and operational continuity. This article provides a comprehensive guide to cybersecurity tips for small business owners, covering actionable strategies to build a robust defense against online threats. — 1. Understand the Cybersecurity Threats You Face Small businesses are often targeted because they may lack the advanced security systems that larger organizations have. Understanding the types of threats you’re up against is the first step in protecting your data. Cybercriminals use a variety of tactics, including phishing, malware, and data breaches, to gain unauthorized access to sensitive information. For instance, phishing attacks are among the most common, with hackers sending fraudulent emails to trick employees into revealing login credentials or financial details. These attacks can be incredibly subtle, making it easy for small businesses to overlook them until it’s too late. To stay ahead, small business owners must recognize the most prevalent threats. Malware, such as ransomware, can encrypt your data and demand payment in exchange for access. This type of attack is particularly dangerous because it often spreads through infected software or malicious websites. Additionally, data breaches can occur due to weak passwords, unsecured networks, or outdated systems. By familiarizing yourself with these risks, you can tailor your security strategies to address them directly. Another emerging threat is zero-day attacks, where hackers exploit vulnerabilities in software before developers have a chance to fix them. These attacks are especially risky for small businesses that rely on third-party tools without regular security audits. Understanding the landscape of cybersecurity threats helps you prioritize which risks to tackle first. For example, if your business handles customer data, securing your email systems and cloud storage becomes a top priority. — 2. Implement Basic Security Measures The foundation of a strong cybersecurity strategy begins with simple yet effective measures. Small business owners often overlook the basics, such as using firewalls and antivirus software, which act as the first line of defense against cyber threats. A firewall monitors and controls incoming and outgoing network traffic, while antivirus software detects and removes malicious programs. These tools are essential for protecting your network from unauthorized access and malware infections. In addition to firewalls and antivirus, encrypted communication should be a standard practice. Encrypting data ensures that even if it’s intercepted, it remains unreadable to anyone without the decryption key. This is particularly important for sensitive business information, such as financial records, client data, and internal communications. Many businesses use email and messaging apps daily, so incorporating encryption into these channels is a must. Multi-factor authentication (MFA) is another critical step. MFA requires users to provide two or more verification methods to access accounts, such as a password and a one-time code sent to their phone. This significantly reduces the risk of unauthorized access, even if a password is compromised. Implementing MFA for all business accounts—especially those with access to critical data—can prevent many common cyber incidents. — 3. Create a Cybersecurity Plan A well-structured cybersecurity plan is essential for small businesses to stay prepared for potential threats. Start by identifying your business’s most valuable assets, such as customer databases, financial systems, and proprietary information. Once you know what’s at risk, you can allocate resources and prioritize security measures accordingly. For example, if your business relies heavily on online transactions, securing your payment gateway becomes a top priority. Next, outline specific security protocols for your team to follow. This should include guidelines for data handling, access controls, and incident response. A clear plan ensures that everyone in your organization knows their role in protecting sensitive information. For instance, establishing a policy that requires employees to update passwords every 90 days or to use secure networks when accessing company data can prevent many common security lapses. Finally, regularly review and update your cybersecurity plan. Cyber threats evolve rapidly, so what works today may not be sufficient tomorrow. Schedule quarterly audits to check for vulnerabilities, test your backup systems, and ensure your team is trained on the latest security practices. By maintaining an adaptable and proactive plan, you can minimize the impact of cyberattacks and ensure your business remains resilient. — 1. Secure Your Email Accounts Email is one of the most common entry points for cyberattacks. Phishing emails are designed to mimic trusted sources, such as banks or colleagues, to steal login credentials or money. These emails often contain urgent requests or attachments that look harmless but are actually malicious. Small businesses must take steps to secure their email accounts and protect their teams from falling victim to these schemes. Implementing email security tools is a practical solution. Services like SPF, DKIM, and DMARC help verify the authenticity of emails and prevent spoofing. These protocols ensure that only authorized senders can use your domain to send emails, reducing the risk of fraudulent messages reaching your employees. Additionally, email filtering software can automatically detect and block spam, malware, and suspicious links before they reach your inbox. Employees should also be trained to recognize common phishing tactics. This includes looking for typos in email addresses, verifying the sender’s identity before clicking on links, and avoiding sharing sensitive information via email without confirming its legitimacy. A simple habit like checking the sender’s email address for errors can save your business from a costly breach. — 2. Use Strong Passwords and Password Managers One of the simplest yet most effective cybersecurity tips for small business owners is to enforce strong password practices. Weak passwords are a common entry point for hackers, who use brute-force attacks or password-cracking tools to gain access to accounts. A strong password should

Subnetting Basics Tutorial: Simplify Your Networking Knowledge
Subnetting Basics Tutorial: Simplify Your Networking Knowledge In the ever-evolving world of networking, understanding subnetting basics tutorial is essential for anyone aiming to master IP address management, network security, and efficient resource allocation. Subnetting, a fundamental concept in networking, allows you to divide a large network into smaller, more manageable segments. This process not only optimizes network performance but also enhances security and simplifies troubleshooting. Whether you’re a beginner or an intermediate learner, this subnetting basics tutorial will equip you with the knowledge to navigate the complexities of IP subnetting confidently. By breaking down the topic into digestible sections, we’ll explore the principles, practical applications, and tools that make subnetting an indispensable skill for modern network administrators. — Understanding the Importance of Subnetting 1. Why Subnetting Matters Subnetting is a cornerstone of network design, enabling organizations to efficiently utilize IP addresses and reduce network congestion. In the early days of the internet, IP addresses were allocated in large blocks, leading to rapid exhaustion of the available IPv4 address space. Subnetting addresses this issue by allowing networks to be segmented into smaller subnetworks, each with its own unique subnet mask. This division ensures that traffic remains localized within specific subnets, minimizing broadcast domains and improving overall network efficiency. Without subnetting, managing large networks becomes cumbersome. For example, a single organization with thousands of devices would require a massive IP address pool, which could lead to wasted IP addresses and slower data transmission. Subnetting enables the creation of smaller, more targeted networks, reducing the load on routers and switches while making it easier to allocate resources. This subnetting basics tutorial will help you grasp how these benefits translate into practical network configurations. 2. Core Concepts of Subnetting To comprehend subnetting, you need to familiarize yourself with key concepts such as IP addresses, subnet masks, and network prefixes. An IP address serves as a unique identifier for devices on a network, while a subnet mask defines the portion of the IP address that represents the network and the portion that identifies individual devices. Together, these elements determine how data is routed within and between subnets. The subnet mask is crucial in subnetting because it tells the network how many bits are used for the network portion and how many for the host portion. For instance, a /24 subnet mask (255.255.255.0) divides an IP address into a 24-bit network identifier and an 8-bit host identifier, allowing for 254 usable host addresses. This subnetting basics tutorial will explain how to interpret and apply subnet masks effectively. 3. How Subnetting Enhances Network Scalability One of the primary advantages of subnetting is its ability to scale networks seamlessly. By creating subnets, you can allocate IP addresses based on the needs of different departments, locations, or functions within an organization. For example, a company might use one subnet for its finance department, another for IT, and a third for marketing. This segmentation ensures that each subnet operates independently, preventing unnecessary traffic from interfering with other parts of the network. Subnetting also facilitates easier management of network resources. When a network is divided into subnets, administrators can apply specific configurations, security policies, and Quality of Service (QoS) rules to each segment. This targeted approach reduces the risk of configuration errors and enhances overall network reliability. A subnetting basics tutorial will guide you through the practical steps of designing such scalable networks. — Subnetting Basics: A Comprehensive Overview 1. The Role of IP Address Classes in Subnetting Before diving into modern subnetting techniques, it’s important to understand the legacy IP classes (Class A, B, C, D, and E) that were used in the early days of networking. These classes determined how IP addresses were divided into network and host portions. Class A addresses, for instance, had an 8-bit network identifier and 24-bit host identifier, while Class C addresses used 24 bits for the network and 8 bits for the host. However, with the introduction of CIDR (Classless Inter-Domain Routing), these traditional classes have been largely replaced by a more flexible system. CIDR allows for variable-length subnet masks, making it possible to divide networks into subnets of different sizes. This subnetting basics tutorial will walk you through how CIDR revolutionized IP address allocation and how it’s used today. 2. Calculating Subnet Sizes and Addresses A critical skill in subnetting is the ability to calculate the number of subnets and host addresses available for each. The formula for determining the number of subnets is 2^n, where n is the number of bits borrowed from the host portion. For example, borrowing 2 bits would create 2^2 = 4 subnets. The number of usable host addresses is calculated as 2^m – 2, where m is the number of bits left for hosts. Let’s break this down with a practical example. If you have a /24 network (255.255.255.0), you can borrow bits to create smaller subnets. Borrowing 3 bits would result in a /27 subnet mask, which allows for 8 subnets and 30 usable host addresses. This subnetting basics tutorial will provide step-by-step guidance on how to perform these calculations accurately. 3. The Impact of Subnetting on Network Performance Subnetting not only optimizes IP address usage but also improves network performance by reducing the size of broadcast domains. In a non-subnetted network, all devices share the same broadcast domain, which can lead to increased latency and slower data transmission. By segmenting the network into smaller subnets, you limit the scope of broadcast traffic, ensuring that only necessary devices receive it. Additionally, subnetting enhances security by isolating different parts of the network. For example, placing a server in a separate subnet can prevent unauthorized access to end-user devices. This subnetting basics tutorial will highlight how these performance and security benefits can be leveraged in real-world scenarios. — How Subnetting Works: Step-by-Step Breakdown 1. The Basics of IP Addressing and Subnetting IP addressing is the foundation of subnetting. Every device on a network must have a unique IP address, which is divided into network and host

What is Split Tunneling in VPN Technology? Explained Simply
What is Split Tunneling in VPN Technology? Explained Simply In the realm of cybersecurity and network privacy, what is split tunneling in vpn technology has become a critical concept for users seeking to optimize their online experience. Split tunneling is a feature in Virtual Private Network (VPN) software that allows users to route some internet traffic through the encrypted tunnel provided by the VPN while directing other traffic directly through their local internet connection. This dual-path approach offers a unique balance between security, performance, and convenience, making it a popular choice among both casual users and enterprise professionals. As the demand for secure and fast internet access grows, understanding how split tunneling works and its implications can help users make informed decisions about their network configurations. This article will delve into the fundamentals of split tunneling, its mechanics, advantages, disadvantages, use cases, and address common questions to provide a comprehensive overview of this essential VPN feature. — H2: Understanding the Basics of Split Tunneling H3: 1. Definition and Core Concept Split tunneling in VPN technology refers to the ability to separate internet traffic into two distinct paths: one through the VPN tunnel and another through the local network. This means that not all data sent from a device is encrypted and routed through the secure VPN connection. Instead, users can choose which applications or services to route through the VPN and which to use the default internet connection. For example, if you’re using a VPN to access a secure corporate network, you might still use your local connection for streaming services or public Wi-Fi browsing. This flexibility is a key differentiator for users who want to maintain performance while ensuring security for specific tasks. H3: 2. How Split Tunneling Differs from Regular Tunneling Unlike regular tunneling, which routes all traffic through the encrypted connection, split tunneling allows for partial routing. Regular tunneling is ideal for users who need complete security, such as accessing sensitive data over public networks. In contrast, split tunneling is beneficial for scenarios where performance is a priority. By keeping some traffic on the local network, users can avoid potential bottlenecks caused by the VPN’s encryption process, which can slow down internet speed. This distinction is crucial for understanding when to use each method and how they impact user experience. H3: 3. The Importance of Split Tunneling in Modern Networks With the rise of remote work and the increasing number of devices connected to the internet, split tunneling has emerged as a vital tool for managing network traffic efficiently. It allows users to balance security and speed, which is particularly useful in enterprise environments where employees may need to access both internal resources and external services. Additionally, in personal use, split tunneling can be a game-changer for streaming, gaming, or torrenting while still securing sensitive data. This feature is especially relevant in today’s digital landscape, where users demand both privacy and performance without compromising one for the other. — H2: How Split Tunneling Works in Practice H3: 1. The Mechanics of Split Tunneling Split tunneling operates by configuring the routing table on a user’s device to direct traffic through different paths based on specific rules or criteria. These rules can be set manually by the user, such as specifying certain IP addresses or domains to route through the VPN, or they can be automatically managed by the VPN software based on predefined settings. When a device connects to a VPN, it establishes a secure tunnel with the remote server, and the traffic that meets the split tunneling criteria is sent through this tunnel. All other traffic bypasses the tunnel and uses the local network, ensuring faster speeds for non-sensitive activities. H3: 2. Routing Rules and Configuration Options Most split tunneling configurations are based on IP addresses, domain names, or application-specific settings. For instance, a user might configure their device to route traffic to a company’s internal servers through the VPN while allowing internet traffic to streaming platforms to use the local connection. This level of customization is often available in enterprise-grade VPNs but may be simpler in consumer-focused solutions. Users can also choose split tunneling by location, split tunneling by protocol, or split tunneling by port, depending on the software’s capabilities. H3: 3. The Role of the Operating System and Router Split tunneling can be implemented either through the device’s operating system or via the router’s settings. When enabled on the device, the VPN client manages the routing rules, making it user-friendly for individuals. However, router-based split tunneling is often preferred in business environments because it allows centralized control over network traffic for all devices connected to the network. This approach ensures consistency and reduces the risk of misconfiguration by individual users. — H2: Advantages of Split Tunneling in VPNs H3: 1. Enhanced Network Performance One of the primary benefits of split tunneling is improved speed and reduced latency. By routing non-sensitive traffic directly through the local internet connection, users can avoid the overhead of encryption and tunneling processes, which can be resource-intensive. This is especially valuable for activities like video streaming, online gaming, or large file downloads, where latency can significantly impact the user experience. Split tunneling ensures that these performance-critical tasks are not hindered by the VPN’s encryption. H3: 2. Flexibility in Traffic Management Split tunneling provides greater control over which data is encrypted and which is not. This flexibility is ideal for users who need to access both secure internal resources and public internet services. For example, a remote employee might route traffic to the company’s network through the VPN while allowing traffic to social media platforms to use the local connection. This customization allows users to tailor their network setup to their specific needs, balancing security and convenience. H3: 3. Cost and Resource Efficiency In enterprise environments, split tunneling can reduce bandwidth usage and lower costs. By keeping non-critical traffic on the local network, companies can save on data transfer expenses while still ensuring secure access to their internal systems. This efficiency

How to Learn Cybersecurity from Scratch: A Beginner’s Guide
In today’s digital age, how to learn cybersecurity from scratch has become one of the most sought-after skills. Whether you're a student, a career-changer, or simply curious about protecting digital assets, mastering cybersecurity offers a rewarding path with high demand and competitive salaries. This beginner's guide will walk you through the essential steps, resources, and strategies to build a solid foundation in cybersecurity. By following this structured approach, you'll not only gain knowledge but also develop practical skills that are critical in a world where cyber threats are constantly evolving. — Understanding the Basics of Cybersecurity Before diving into the technical aspects, it’s crucial to understand the basics of cybersecurity. Cybersecurity is the practice of protecting internet-connected systems—such as hardware, software, and data—from cyber threats. These threats can range from malicious attacks like hacking and phishing to accidental data breaches. By grasping the fundamental concepts, you’ll be better equipped to navigate the complexities of the field. Cybersecurity is divided into several key areas, including network security, application security, information security, and operational security. Each of these domains focuses on safeguarding different components of a system. For example, network security ensures that data transmitted over networks is secure, while application security focuses on protecting software applications from vulnerabilities. Understanding these areas will help you identify which specializations align with your interests. To truly how to learn cybersecurity from scratch, start by defining your learning goals. Are you interested in penetration testing, ethical hacking, or network administration? Your goals will determine the learning path and resources you need. Additionally, familiarize yourself with common cyber threats and attack vectors, such as malware, ransomware, and social engineering. This knowledge will give you a clearer picture of what you’re working toward and how to stay ahead of potential risks. — Setting Up a Learning Plan A well-structured learning plan is the cornerstone of success in cybersecurity. Without a clear roadmap, even the most dedicated learners can feel overwhelmed. Begin by identifying your learning goals and then break them down into manageable steps. This approach ensures that you stay focused and progress systematically. 1. Define Your Learning Goals Your goals will shape your learning journey. For example, if you aim to become a certified cybersecurity professional, you might need to prioritize learning specific skills such as network security, cryptography, or risk management. Alternatively, if you're interested in a more general understanding, focus on foundational concepts like threat detection and data protection. 2. Choose the Right Resources Selecting the right resources is critical. Free platforms like Cybrary, Udemy, and freeCodeCamp offer beginner-friendly courses. Paid platforms like Coursera and LinkedIn Learning provide structured programs with certifications. Additionally, books such as Cybersecurity for Beginners by Jason Bloomberg and The Cybersecurity Guide for Beginners by Chris Hoff can serve as valuable references. Don’t forget to leverage online communities and forums for real-time support. 3. Create a Study Schedule Consistency is key in learning cybersecurity. Allocate specific time slots for studying each week, and use a calendar to track your progress. For instance, dedicate two hours daily to theoretical concepts and one hour to hands-on practice. This habit will help you retain information and build practical skills over time. — Building Foundational Skills Once you have a clear plan, the next step is to build foundational skills. These skills form the bedrock of your cybersecurity expertise and are essential for advancing in the field. Start with the basics and gradually progress to more complex topics as your confidence grows. 1. Learn Programming Languages Programming is a vital skill in cybersecurity. Begin with languages like Python, which is widely used in ethical hacking and network analysis. Python’s simplicity makes it an excellent choice for beginners, while its versatility allows you to tackle advanced tasks later. Other useful languages include C, Java, and JavaScript, which are often used in system programming and web security. 2. Master Networking Fundamentals Understanding networking is crucial because cyberattacks often target network vulnerabilities. Learn about TCP/IP protocols, subnetting, and network devices like routers and switches. Tools such as Wireshark and Nmap will help you analyze network traffic and identify potential threats. Hands-on practice with virtual networks (using platforms like GNS3 or Cisco Packet Tracer) will reinforce your theoretical knowledge. 3. Get Familiar with Operating Systems Operating systems are the backbone of cybersecurity. Focus on mastering Linux, as it is the primary system used in penetration testing and server management. Learn commands for file manipulation, process monitoring, and user management. Windows is also important, especially for enterprise environments. — Hands-On Practice and Experimentation Theoretical knowledge is only part of the equation; hands-on practice is where you truly apply what you’ve learned. Cybersecurity requires practical skills, such as configuring firewalls, analyzing malware, and performing penetration tests. Start experimenting with virtual environments and tools to gain real-world experience. 1. Set Up a Lab Environment A dedicated lab environment allows you to practice without risking real systems. Use virtual machines (VMs) to simulate networks and test security measures. Platforms like VMware, VirtualBox, and Docker are great for this. Additionally, cloud-based labs like Hack The Box or TryHackMe provide access to pre-configured environments with real-world scenarios. 2. Practice with Tools and Techniques Familiarize yourself with essential cybersecurity tools. For example, use Kali Linux for penetration testing, Metasploit for exploit development, and Wireshark for packet analysis. Practice techniques like packet sniffing, port scanning, and vulnerability assessment. This will help you understand how attackers operate and how to defend against them. 3. Participate in Capture the Flag (CTF) Challenges CTF challenges are a fun and effective way to practice cybersecurity skills. These challenges simulate real-world attacks and require you to solve puzzles to gain access to systems. Platforms like CTFtime and CTF.io host various competitions, from beginner-friendly to advanced levels. CTFs improve problem-solving abilities and provide a collaborative learning environment. — Exploring Advanced Topics and Specializations As you progress, it’s time to explore advanced topics and choose a specialization. Cybersecurity is a broad field with numerous sub-disciplines, such as cryptography, incident response, and digital
How Site-to-Site VPN Architecture Works: Essential Insights
How Site-to-Site VPN Architecture Works: Essential Insights In today’s interconnected digital landscape, site-to-site VPN architecture has become a cornerstone for securing communication between remote offices, branch locations, and data centers. As organizations expand their operations across multiple locations, the need for seamless, secure, and reliable connectivity has never been more critical. A site-to-site VPN architecture ensures that data transmitted between two or more networks remains encrypted and protected from external threats. This article will explore the intricacies of how this architecture functions, its key components, benefits, and real-world applications. Whether you’re a network administrator, IT professional, or business owner, understanding the mechanics of site-to-site vpn architecture is essential for optimizing your organization’s cybersecurity and operational efficiency. — Understanding Site-to-Site VPN Architecture 1. What is Site-to-Site VPN Architecture? A site-to-site VPN architecture is a network configuration that connects two or more geographically separate networks over a public internet. Unlike client-based VPNs, which are used by individual users to access a private network, site-to-site VPNs are designed for enterprise-level connectivity. This architecture is particularly useful for businesses with multiple offices or remote data centers, enabling secure data exchange without the need for dedicated leased lines. The core principle of site-to-site vpn architecture is to create a secure tunnel between the networks, ensuring that all traffic passing through the tunnel is encrypted and isolated from the public internet. This is achieved using IPsec (Internet Protocol Security) or SSL/TLS protocols, which authenticate devices and encrypt data packets. By using site-to-site vpn architecture, organizations can maintain consistent security policies across all their locations while reducing costs associated with traditional Wide Area Network (WAN) solutions. 2. How Does Site-to-Site VPN Architecture Differ from Other VPN Types? While site-to-site vpn architecture is one of the most common types of VPNs, it differs from client-based or remote access VPNs in several ways. For instance, client-based VPNs are used by individual users to connect to a private network, whereas site-to-site vpn architecture is ideal for connecting entire networks. This makes it a preferred solution for multi-site organizations. Another key distinction lies in how traffic is routed. In a site-to-site vpn architecture, traffic between networks is routed through a virtual private network tunnel, ensuring that data remains secure even when transmitted over the public internet. This is particularly important for businesses handling sensitive data, such as financial records or customer information. 3. Why Is Site-to-Site VPN Architecture Important in Modern Networking? The significance of site-to-site vpn architecture in modern networking cannot be overstated. As companies adopt hybrid cloud environments and expand into remote locations, the need for secure and scalable connectivity has grown exponentially. Site-to-site vpn architecture provides a robust solution by enabling encrypted communication between networks, ensuring data integrity, confidentiality, and availability. Moreover, site-to-site vpn architecture offers cost-effective scalability, allowing businesses to add new locations or expand their existing infrastructure without significant reconfiguration. It also supports load balancing and traffic prioritization, which are essential for maintaining consistent performance across all connected sites. — Key Components of Site-to-Site VPN Architecture 1. Routers and Gateways The foundation of any site-to-site vpn architecture is the routers and gateways that manage the connections. These devices are typically located at the edge of each network and are responsible for encrypting and decrypting data packets. Routers act as the primary interface between the private network and the public internet, while gateways handle the management of the VPN tunnel and traffic routing. To ensure seamless communication, routers and gateways must be configured with site-to-site vpn architecture specifications. This includes setting up the encryption protocols, defining the tunnel endpoints, and configuring routing tables. Modern routers often come with built-in VPN functionality, making it easier to deploy and manage site-to-site vpn architecture. 2. Encryption Protocols Encryption is a critical component of site-to-site vpn architecture, as it ensures that data transmitted between networks remains private. The most commonly used encryption protocols in this setup are IPsec (Internet Protocol Security) and SSL/TLS (Secure Sockets Layer/Transport Layer Security). IPsec is a protocol suite that provides end-to-end encryption for data packets. It works at the network layer, encrypting data before it is transmitted over the internet. On the other hand, SSL/TLS operates at the application layer, encrypting data at the source and destination. Both protocols are widely used in site-to-site vpn architecture, but IPsec is often preferred for enterprise-level security due to its stronger encryption standards. 3. Tunneling Technology Tunneling is the process of encapsulating data packets into a virtual tunnel to ensure secure transmission. In site-to-site vpn architecture, tunneling technology such as GRE (Generic Routing Encapsulation) or PPTP (Point-to-Point Tunneling Protocol) is used to create secure channels between networks. GRE is a simple and flexible tunneling protocol that supports multiple network layer protocols. However, it is less secure compared to IPsec, which is often used in site-to-site vpn architecture for its strong authentication and encryption features. PPTP, while easy to set up, is considered less secure due to its weaker encryption standards. The choice of tunneling protocol depends on the security requirements, performance needs, and compatibility of the networks involved. — How Site-to-Site VPN Architecture Functions 1. Establishing the Connection The first step in the site-to-site vpn architecture process is establishing a secure connection between the two networks. This involves configuring the routers or gateways at each site to create tunnel endpoints. The tunnel endpoints are defined by IP addresses or DNS names, ensuring that the tunnel is established correctly. Once the endpoints are configured, the routers or gateways initiate a handshake to authenticate each other. This handshake uses pre-shared keys or digital certificates to verify the identity of the networks. If the authentication is successful, the tunnel is created, allowing secure data transmission between the networks. 2. Data Transmission and Encryption After the tunnel is established, data packets are transmitted through the virtual private network. The data is encrypted using encryption protocols such as IPsec or SSL/TLS, ensuring that only authorized devices can access the data. The encryption process involves converting plaintext data into ciphertext using symmetric or asymmetric
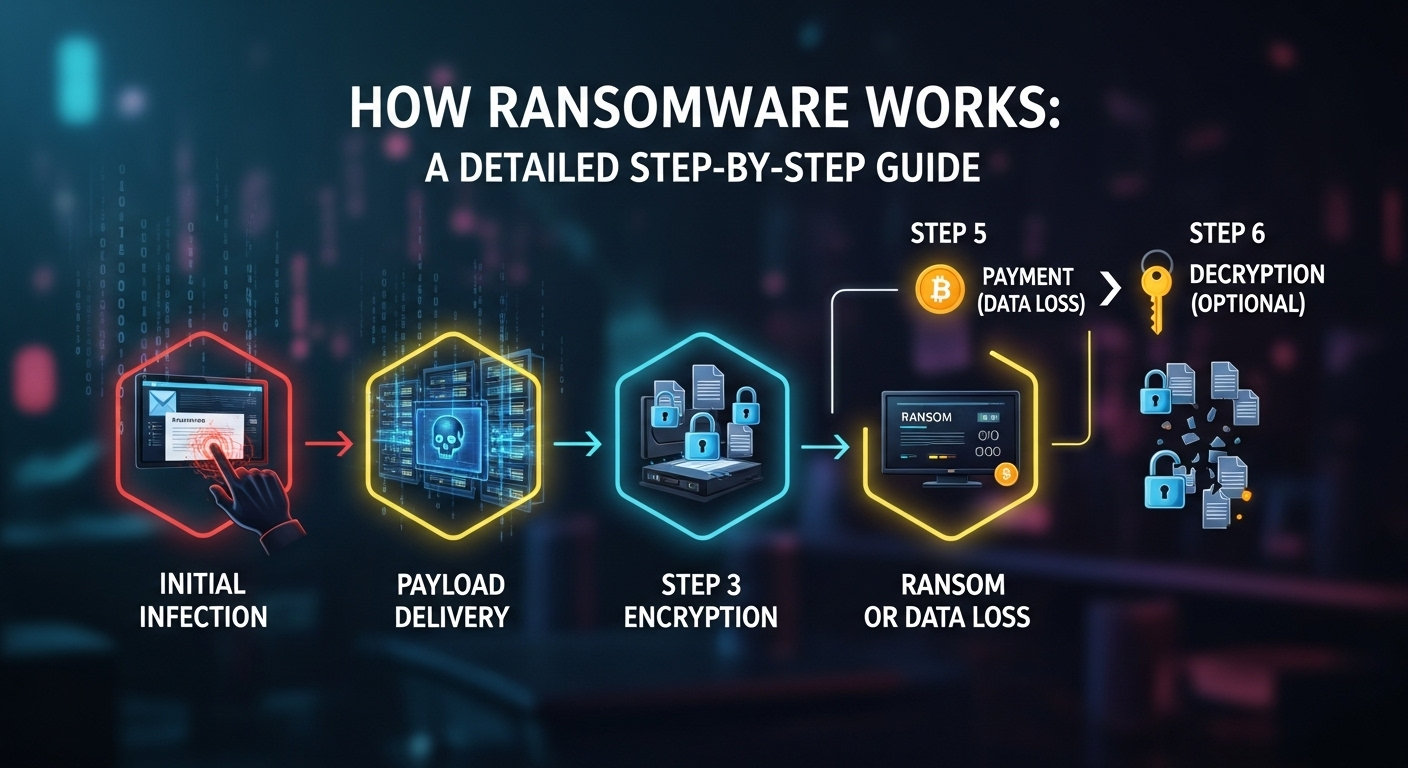
How Ransomware Works: A Detailed Step-by-Step Guide
In an age where our lives are inextricably linked to digital data, the threat of losing access to it all is more terrifying than ever. Imagine one day turning on your computer only to find every single file—family photos, critical work documents, financial records—locked away by a digital padlock, with a menacing note demanding a hefty sum for the key. This is not a scene from a sci-fi movie; it is the reality of a ransomware attack. Understanding the mechanics behind this pervasive cyber threat is the first and most crucial step in defending against it. This guide will provide a detailed, step-by-step breakdown of how does ransomware work, from the initial breach to the final, tense moments of extortion. The Initial Breach: Gaining Access to the System Every ransomware attack begins with a single, critical moment: the breach. Threat actors, the individuals or groups behind these attacks, employ a variety of sophisticated and sometimes surprisingly simple techniques to infiltrate a target's network or device. This initial access is the foundation upon which the entire attack is built. Without it, the ransomware payload can never be deployed, and the subsequent chaos can be avoided. The methods used are constantly evolving, but they generally fall into a few key categories that exploit both technological vulnerabilities and human psychology. The goal of this initial phase is not to encrypt files immediately but to establish a foothold. Think of it as a burglar successfully picking the lock on a front door. They are inside the house, but they haven't started taking valuables yet. They will first scout the area, disable alarms, and ensure they can operate without being detected. Similarly, after a successful breach, the malicious software will often lie dormant or perform quiet reconnaissance, preparing the environment for the main event. This stealthy approach makes early detection incredibly difficult without advanced security monitoring tools. Understanding these entry points is paramount for building an effective defense. By shoring up the most common infiltration vectors, organizations and individuals can significantly reduce their attack surface and decrease the likelihood of becoming a victim. It’s a constant cat-and-mouse game where defenders must patch vulnerabilities and train users, while attackers relentlessly search for the next weak link. Phishing and Social Engineering: The Human Element The single most common delivery method for ransomware remains phishing. This social engineering technique preys on human trust and curiosity. Attackers craft deceptive emails that appear to be from a legitimate source—a bank, a colleague, a delivery service, or even an internal IT department. These emails often create a sense of urgency or fear, prompting the recipient to click a malicious link or download a compromised attachment without thinking twice. A classic example is an email with a subject like "Urgent: Invoice Overdue" containing an attached Word document or PDF. Once the recipient opens the attachment, they might be prompted to "Enable Content" or "Enable Macros" to view the document properly. This action is the trigger that executes a hidden script, downloading the ransomware payload from a remote server onto the victim's computer. Similarly, clicking a malicious link can redirect the user to a spoofed login page designed to steal credentials or to a website that uses an exploit kit to silently install the malware. Spear phishing is an even more targeted and dangerous variant, where attackers research their victim and craft a highly personalized email that is much harder to recognize as fraudulent. Exploit Kits and Unpatched Vulnerabilities While phishing relies on human error, other methods exploit purely technical weaknesses. Attackers are constantly scanning the internet for systems running outdated software with known vulnerabilities. This includes unpatched operating systems (like Windows or macOS), web browsers, and third-party plugins such as Adobe Flash Player or Java. When a security flaw is discovered, software vendors release a patch to fix it. However, many users and organizations fail to apply these patches promptly, leaving a window of opportunity for attackers. An exploit kit is a toolkit hosted on a compromised website that automates the process of exploiting these vulnerabilities. When a user with an unpatched system visits such a site (often redirected there via a malicious ad, or malvertising), the exploit kit scans their browser and plugins for any known weaknesses. If one is found, the kit automatically deploys an exploit to gain control of the system and deliver the ransomware payload. This entire process happens silently in the background, without any further action required from the user, making it an incredibly effective infiltration method. Remote Desktop Protocol (RDP) and Weak Credentials Remote Desktop Protocol (RDP) is a feature built into Windows that allows users to connect to and control another computer over a network. It is an invaluable tool for system administrators and remote workers. However, when poorly secured, it becomes a wide-open door for attackers. Cybercriminals scan the internet for computers with open RDP ports (typically port 3389) and then attempt to gain access using a variety of methods. The most common approach is a brute-force attack, where automated software tries thousands of common username and password combinations until it finds one that works. This is particularly effective against accounts with weak, easily guessable passwords like "123456" or "password." Alternatively, attackers can purchase stolen RDP credentials from dark web marketplaces. Once they have legitimate access, they can log in just like an authorized user, disable security software, and manually deploy the ransomware across the entire network. The Infection and Establishment Phase Once the initial breach is successful, the ransomware doesn't just start encrypting files immediately. Doing so would be rash and could lead to early detection and removal. Instead, the malware enters a crucial second phase: establishing itself on the system, escalating its privileges, and preparing the battlefield for the main attack. This stage is characterized by stealth and sabotage, as the ransomware works to solidify its control and dismantle any potential defenses that could interfere with its ultimate goal. During this phase, the malware aims to become a persistent part of
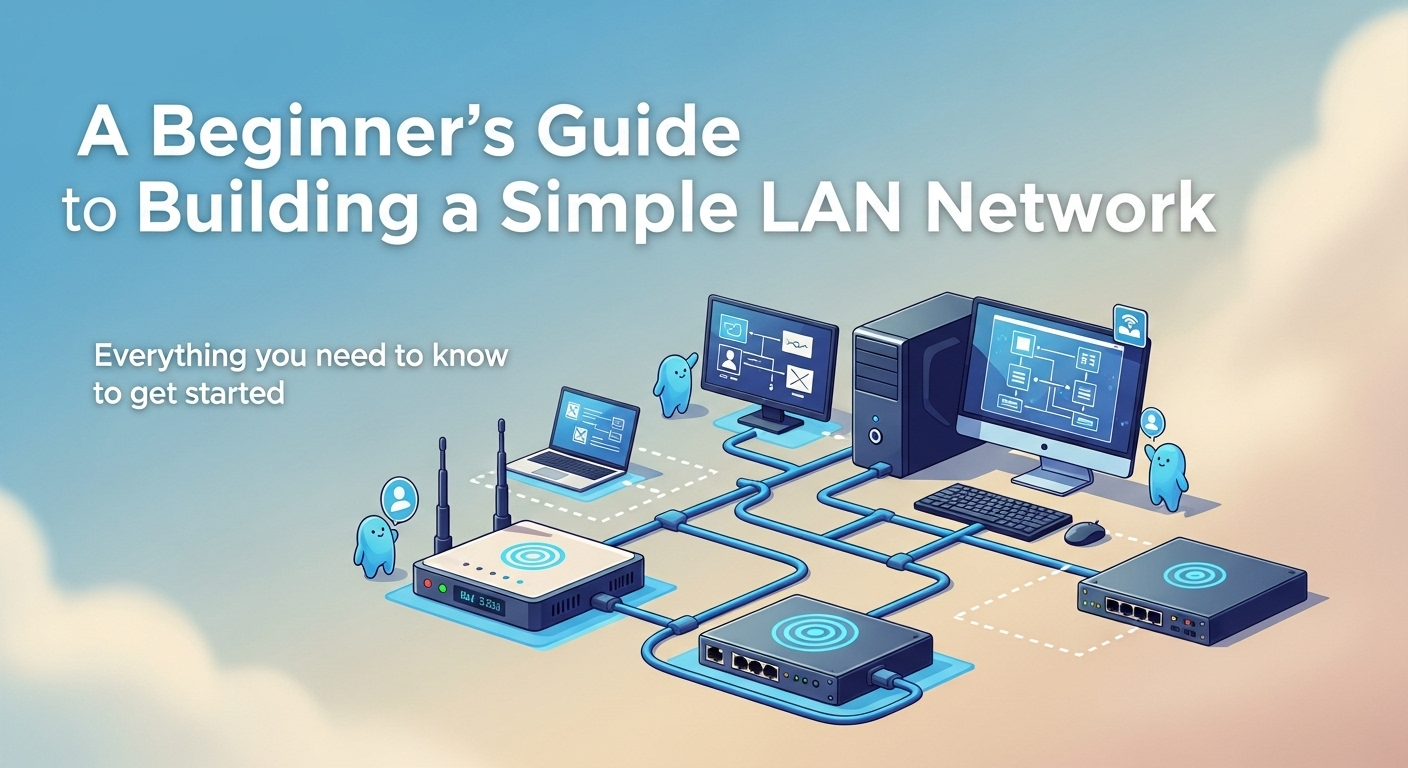
A Beginner’s Guide to Building a Simple LAN Network
Building your own home or small office network might sound like a task reserved for IT professionals, but it's more accessible than you think. With a little guidance and the right components, anyone can create a fast, stable, and secure Local Area Network (LAN). A well-built LAN is the backbone of modern connectivity, enabling everything from seamless file sharing and online gaming to streaming high-definition media across multiple devices. This guide is designed to demystify the process and provide clear, step-by-step instructions. By the end of this article, you will have a comprehensive understanding of how to build a simple LAN network from scratch, empowering you to take full control of your digital environment. What is a LAN and Why Should You Build One? At its core, a Local Area Network (LAN) is a collection of connected devices within a limited geographical area, such as a home, school, or office building. Think of it as your own private digital ecosystem. This is in contrast to a Wide Area Network (WAN), like the internet itself, which connects devices over vast distances. Your LAN connects to the internet (a WAN) through a device called a router, which acts as a gateway. Building your own LAN provides a foundational layer of control, security, and performance that relying solely on a single, provider-issued Wi-Fi box might not offer. The benefits of a dedicated LAN are numerous and tangible. It facilitates high-speed communication between your devices without needing to send data out to the internet and back. This is perfect for transferring large files between computers, streaming media from a local storage device (like a NAS) to your smart TV, or setting up a shared printer that everyone in the household can use. For gamers, a wired LAN connection provides the lowest possible latency (ping), which is crucial for competitive online gaming. Furthermore, it allows for centralized data backups, ensuring all your important files are safely stored in one place. While the term "network" can conjure images of complex server rooms, a simple LAN is surprisingly straightforward. For a home or small office, your network will typically consist of a router, some cables, and the devices you want to connect, such as computers, printers, and gaming consoles. The goal is not to build a corporate-level infrastructure but to create a robust and reliable system that meets your daily needs. This guide focuses on this simple, practical approach, ensuring the project remains manageable, affordable, and highly effective. Gathering Your Essential Equipment: The Building Blocks of Your Network Before you can connect anything, you need to gather the necessary hardware. Think of these components as the fundamental building blocks of your network. Selecting the right equipment is crucial for ensuring stability, speed, and future-proofing your setup. While there's a vast array of networking gear available, a simple home LAN only requires a few key pieces. It's important to understand the role of each component to make informed decisions. This section will break down the essential hardware you'll need. We'll cover the function of each device, what features to look for, and why certain components are recommended for beginners. Don't be intimidated by the terminology; we'll explain everything in simple terms. The goal is to equip you with the knowledge to either use what you have effectively or purchase new gear with confidence. A small investment in the right hardware now can save you from countless headaches related to slow speeds and unreliable connections later. For a basic but powerful LAN, you’ll focus on four main categories: the router (the brain), the cables (the nervous system), an optional switch (for expansion), and your end devices (the nodes). Understanding how these elements work together is the first major step toward building a successful network. The Network Router: Your LAN's Traffic Controller The router is the single most important component of your LAN. It serves two primary functions. First, it acts as a switch, allowing all the devices within your network to communicate with each other. Second, it acts as a router, directing traffic between your local network and the wider internet. It's the central hub and the gateway, managing all data flow. Most modern consumer routers are integrated devices that also include a built-in Wi-Fi access point, allowing both wired and wireless devices to join the network. When choosing a router, there are several key features to consider. Look for a model that supports modern Wi-Fi standards, such as Wi-Fi 6 (802.11ax), which offers better performance, efficiency, and speed in device-dense environments compared to older standards like Wi-Fi 5 (802.11ac). Also, check the number of Gigabit Ethernet ports. Most routers come with four LAN ports, which might be enough for a small setup. For security, ensure the router supports the WPA3 encryption protocol, which is the current standard for securing wireless networks. Network Cables (Ethernet): The Physical Connection While Wi-Fi is convenient, a wired connection via an Ethernet cable remains the gold standard for speed and reliability. For stationary devices like desktop PCs, smart TVs, game consoles, and network-attached storage (NAS) drives, a wired connection is highly recommended. Ethernet cables come in different categories, but for a simple home network, you'll most likely encounter Cat 5e and Cat 6. Cat 5e cables are capable of supporting speeds up to 1 Gigabit per second (Gbps), which is sufficient for most home internet plans and internal network tasks. Cat 6 cables can support up to 10 Gbps over shorter distances and offer better protection against crosstalk and interference. For a new build, opting for Cat 6 cables is a wise, future-proof choice as they are only slightly more expensive than Cat 5e. You will need cables to connect your modem to your router, and your router to your wired devices. Network Switch (Optional but Recommended for Expansion) A network switch is a simple device that expands the number of available Ethernet ports on your network. Think of it as a power strip for your LAN. Your router typically has a
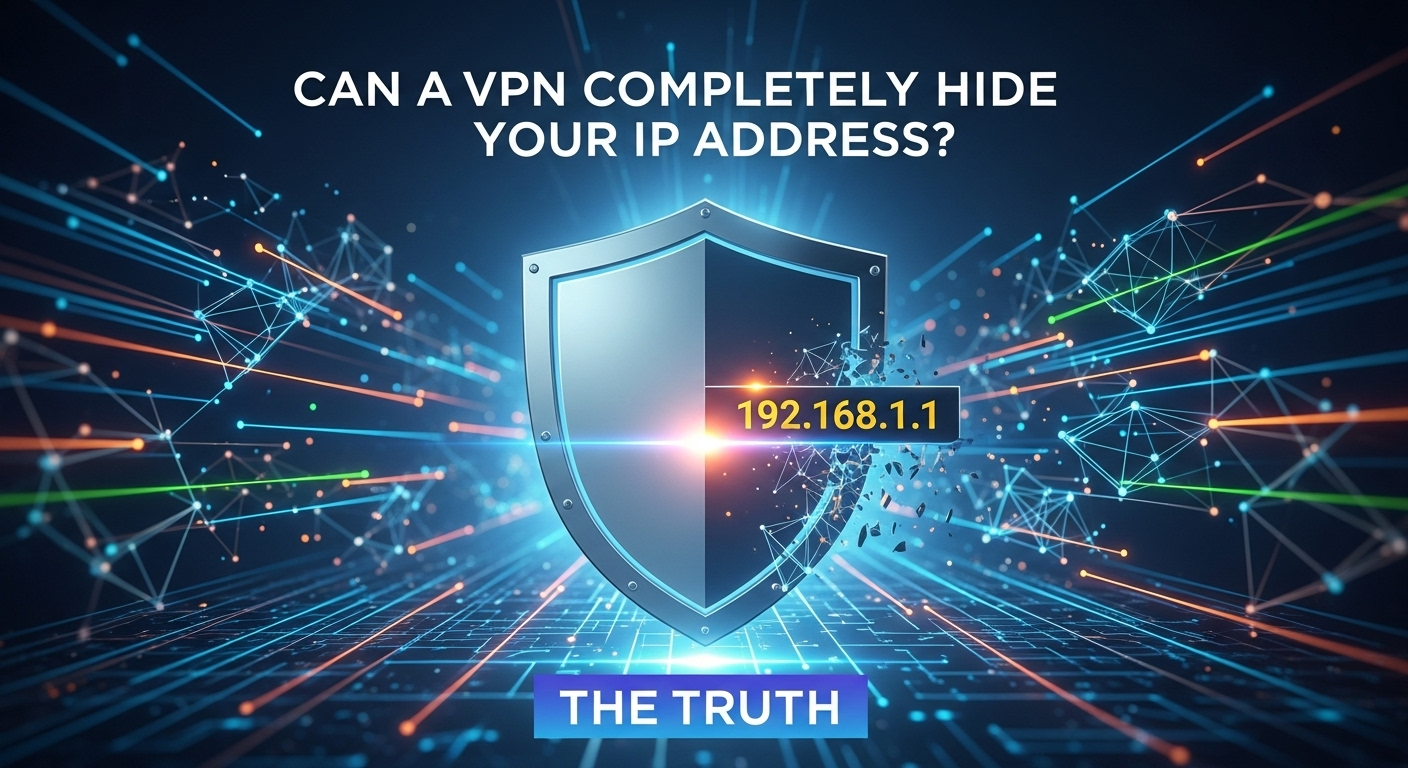
Can a VPN Completely Hide Your IP Address? The Truth
In today’s digitally interconnected world, the concept of privacy feels increasingly elusive. Every click, search, and connection leaves a digital footprint, with your IP address acting as a unique identifier, linking your online activities back to you. This has led to a surge in the popularity of Virtual Private Networks (VPNs) as the go-to tool for digital anonymity. However, this raises a crucial question that lies at the heart of online security concerns. The quest for online privacy often leads to one critical question: can a VPN completely hide my IP address? While the simple answer is that a VPN is the most effective tool available to the public for this purpose, the word “completely” introduces a layer of complexity that demands a deeper, more truthful exploration. In an era of pervasive tracking by corporations, governments, and malicious actors, understanding the capabilities and limitations of your privacy tools is paramount. A VPN works by creating an encrypted tunnel for your internet traffic and routing it through a server operated by the VPN provider. This process effectively replaces your real IP address with the IP address of the VPN server. To any website or online service you connect to, your location and identity appear to be that of the server, not your own. This fundamental mechanism is the cornerstone of how a VPN provides privacy and security. However, the effectiveness of this process is not absolute. The promise of complete invisibility is contingent on several factors, including the quality of the VPN service, the configuration of your device, and your own online habits. A poorly configured or low-quality VPN can leak your real IP address, rendering its primary function useless. Furthermore, even with a perfect VPN connection, other tracking methods exist that can compromise your anonymity. This article will pull back the curtain on the mechanics of VPNs and IP-hiding. We will explore how a VPN masks your IP address, investigate the common ways it can fail, and discuss other digital breadcrumbs that can reveal your identity. By the end, you will have a clear and realistic understanding of a VPN’s role in your digital privacy toolkit and know whether it can truly offer the complete anonymity many users seek. Understanding the Core Mechanism: How a VPN Masks Your IP To grasp the limitations of a VPN, one must first appreciate its core function. A VPN is, at its heart, a sophisticated privacy tool designed to create a secure and private connection over a public network, like the internet. Its primary method for protecting your identity is by masking your Internet Protocol (IP) address. Think of your IP address as your home’s mailing address in the digital world. It’s a unique string of numbers assigned by your Internet Service Provider (ISP) that identifies your device on the internet, revealing your general geographic location. When you connect to the internet without a VPN, your device communicates directly with websites and online services. This means your real IP address is visible to every site you visit, every server you connect to, and, of course, to your ISP, who can log all your activity. A VPN fundamentally alters this process. It acts as an intermediary, rerouting your traffic through one of its own private servers before sending it to its final destination. This single step is what obscures your IP. The beauty of this system is its dual-layer protection. Not only is your IP address substituted, but the connection between your device and the VPN server is also heavily encrypted. This is known as the “VPN tunnel.” This encryption scrambles your data, making it unreadable to anyone who might try to intercept it, including your ISP or anyone snooping on a public Wi-Fi network. In essence, a VPN provides a new digital identity (the server’s IP) and a protective shield (the encryption) for your online journey. The Encrypted Tunnel: Your Private Data Highway The encrypted tunnel is arguably the most critical component of a VPN’s security. When you activate your VPN, it establishes a secure, point-to-point connection between your device and the VPN server. All data passing through this tunnel is encapsulated and encrypted using complex cryptographic protocols like OpenVPN or WireGuard. This process is akin to taking a letter, placing it inside a locked metal box, and then sending it, rather than simply mailing a postcard for all to read. Even your own ISP, which facilitates your connection to the internet, cannot see the content of your traffic. They can detect that you are connected to a VPN server and see the volume of encrypted data being transferred, but they cannot decipher what websites you are visiting, what files you are downloading, or what messages you are sending. This is a massive step up in privacy, as ISPs in many countries are known to log user activity and may share or sell this data. The tunnel effectively creates a black box around your internet activity. The Server Swap: Adopting a New Digital Identity Once your data is securely inside the encrypted tunnel, it travels to the VPN server you’ve selected. This server can be located anywhere in the world, depending on the provider’s network. When the server receives your request (for example, to load a website), it decrypts it and sends it to the destination website on your behalf. Here is the crucial part: the server uses its own IP address for this request, not yours. To the destination website, it appears as if the request originated directly from the VPN server. If you are in London and connect to a VPN server in Tokyo, every website you visit will see a Japanese IP address. They will tailor content, language, and restrictions based on that Tokyo IP. Your true IP address and location in London remain hidden, known only to the VPN provider (a point we will revisit later). This IP masking is what allows users to bypass geo-restrictions, access region-locked content, and significantly enhance their anonymity online. The Cracks in the