The coffee shop buzz, the quiet hum of a library, or the bustling terminal of an airport—what do they all have in common? They offer the modern convenience of free public WiFi. It's a lifeline that keeps us connected, allowing us to catch up on emails, stream our favorite shows, or scroll through social media while on the go. But beneath this veneer of convenience lies a shadowy world of digital risks. Hackers and snoopers often lurk on these open networks, waiting to intercept your data. This brings up a critical question for any digitally-conscious individual: is it safe to use public wifi with a vpn? The answer is a resounding yes, and understanding why is the key to protecting your digital life. Using a Virtual Private Network (VPN) transforms a dangerously insecure connection into a fortified private channel, acting as your personal bodyguard in the wild west of public internet access. The Hidden Dangers of Unsecured Public WiFi Public WiFi is, by its very nature, a shared resource. Unlike your home network, which is password-protected and used only by people you trust, a public network is an open invitation. Anyone within range can connect, including individuals with malicious intent. The fundamental problem with most public WiFi is the lack of encryption. When you connect to an open network, the data you send and receive—from login credentials and credit card numbers to personal messages and browsing history—is often transmitted "in the clear." This makes it trivially easy for a moderately skilled hacker on the same network to intercept and read everything you do online. Think of it like this: using an unencrypted public network is like sending a postcard. The mail carrier, the person sorting the mail, and anyone who happens to pick it up can read its contents. Your private information is completely exposed. This exposure opens the door to a variety of cyber threats that can have devastating consequences, ranging from financial loss to identity theft. The convenience of checking your bank balance at a cafe is not worth the risk of having your account drained because someone was snooping on the network. The threats are not just theoretical; they are active and widespread. Hackers specifically target high-traffic locations like airports, hotels, and popular cafes because they know people will be eager to connect and may let their guard down. They employ a range of techniques, from passive snooping to active attacks, all designed to exploit the inherent vulnerabilities of an open network. Understanding these specific threats is the first step toward appreciating the critical role a VPN plays in your digital defense. Man-in-the-Middle (MitM) Attacks A Man-in-the-Middle (MitM) attack is one of the most common threats on public WiFi. In this scenario, a hacker secretly positions themselves between you and the internet connection point (the router). All the data flowing from your device to the web—and back again—passes through the attacker's computer. Without your knowledge, they can monitor, capture, and even alter this data. They can steal your usernames and passwords when you log into a website, capture your credit card details during an online purchase, and read your private conversations. The scary part is that a MitM attack is often completely invisible to the victim. Your internet connection will appear to be working normally, giving you no indication that a digital eavesdropper is recording your every move. The hacker essentially becomes an undetectable middleman, exploiting the trust between you and the website or service you are trying to access. This is why performing sensitive activities like online banking on public WiFi without protection is extremely risky. Evil Twin Hotspots An "Evil Twin" attack is a particularly deceptive form of a MitM attack. A hacker sets up their own rogue WiFi hotspot with a name that looks legitimate. For instance, if you're at "The Daily Grind Coffee," you might see two networks: "DailyGrindWiFi" (the real one) and "DailyGrindFreeWiFi" (the evil twin). Many devices are programmed to automatically connect to familiar-looking or open networks, making it easy to fall into this trap. Once you connect to the evil twin, the hacker has complete control. They are not just intercepting your traffic; they are the source of your internet connection. They can redirect you to fake login pages that look identical to the real ones (a technique called phishing) to steal your credentials for banking, email, or social media. You might think you're logging into your bank, but you're actually typing your password directly into the hacker's database. This is a powerful and dangerous attack because it preys on our tendency to trust familiar network names. Malware Injection and Packet Sniffing Unsecured networks can also be used as a delivery system for malware. An attacker on the same network can attempt to exploit software vulnerabilities on your device to inject viruses, spyware, or ransomware. This can happen through pop-up windows that prompt you to install a "software update" or by directly pushing malicious code to your device if it's not properly secured. A single click on the wrong link or an unpatched vulnerability could lead to your device being compromised. Beyond active attacks, there's the simpler threat of packet sniffing. Using readily available software, anyone on the network can "sniff" the data packets flying through the airwaves. If the network is unencrypted, these packets contain the raw data of your online activity. A snooper could see which websites you're visiting, what you're searching for, and parts of your conversations on non-secure apps. While not as overtly destructive as a MitM attack, it represents a significant violation of your privacy. What Is a VPN and How Does It Create a Shield? A Virtual Private Network (VPN) is a service that creates a secure, encrypted connection over a less secure network, such as the public internet. The best way to visualize it is as a private, armored tunnel for your internet traffic. When you connect to a VPN, your device first establishes a connection with a remote server operated by
VPN vs. Proxy Server: The Core Difference Explained
In our increasingly digital world, safeguarding online privacy and accessing unrestricted content have become paramount concerns. Two of the most common tools people turn to are VPNs and proxy servers. At first glance, they appear to serve a similar purpose: masking your digital identity by routing your internet traffic through a third-party server. However, this superficial similarity hides a deep chasm in functionality, security, and purpose. Understanding the core vpn vs proxy server difference is crucial for making an informed choice that aligns with your specific needs, whether you're looking for iron-clad security on public Wi-Fi or simply trying to watch a region-locked video. This guide will dissect these two technologies, exploring their mechanisms, core functionalities, security implications, and ideal use cases to help you navigate the complex landscape of online privacy. What is a Proxy Server? A Gateway to the Web At its most fundamental level, a proxy server acts as an intermediary or a "middleman" between your computer and the internet. When you use a proxy, your internet requests are first sent to the proxy server, which then forwards them to the destination website on your behalf. The website sees the request as coming from the proxy's IP address, not your own. This effectively masks your original IP address, which is the primary function of most proxies. It's like sending a letter through a friend; the recipient sees your friend's return address, not yours. This process is highly effective for simple tasks like bypassing basic geo-restrictions on websites or maintaining a level of anonymity for a single activity. However, a critical point to understand is that most standard proxies operate at the application level. This means you typically configure them for a specific application, such as your web browser or a torrent client. Any traffic from other applications on your device will bypass the proxy and travel directly to the internet, exposing your real IP address. The most significant drawback and a key differentiator from a VPN is the general lack of encryption. A standard HTTP proxy simply relays your data. While it hides your IP, the data itself is often transmitted in plain text between your device and the proxy server. This means that if someone were to intercept your traffic—such as your Internet Service Provider (ISP), a hacker on the same network, or even the proxy provider itself—they could potentially read your data, see the websites you visit, and capture sensitive information like passwords or financial details. Types of Proxy Servers There are several types of proxies, each designed for different purposes. The most common is the HTTP proxy. These are specifically designed to handle web traffic (HTTP and HTTPS protocols). When you configure your web browser to use an HTTP proxy, all your browsing activity is routed through it. This makes them a straightforward solution for accessing websites that might be blocked in your school, office, or country. They can also be used for caching frequently accessed web pages to speed up load times for multiple users on the same network. Despite their utility for web browsing, the limitations of HTTP proxies are significant. They are application-specific and only interpret web-related traffic. This means they cannot be used to mask your IP address for other critical activities like online gaming, video streaming apps that aren't browser-based, or peer-to-peer (P2P) file sharing. For users needing to anonymize more than just their web browser, an HTTP proxy proves insufficient and narrow in its scope of protection. SOCKS5 Proxies: A More Versatile Option A step up from HTTP proxies are SOCKS5 proxies. The key difference is that SOCKS5 proxies are more versatile because they operate at a lower level of the network stack (Layer 5 of the OSI model). This means they are not limited to a specific type of internet traffic like HTTP. A SOCKS5 proxy can handle virtually any kind of data from any application, including web browsing, P2P traffic from torrent clients, FTP for file transfers, and online gaming traffic. This makes them a more flexible and powerful choice for users who need to anonymize a variety of online activities. However, it is crucial to note that while SOCKS5 is a more advanced protocol, it does not inherently include encryption. While some SOCKS5 implementations can be paired with an authentication method, the data passing through the server is typically not encrypted by default. This leaves your traffic vulnerable to snooping, just like with a standard HTTP proxy. While a SOCKS5 proxy is superior for versatility and handling different types of traffic, it still falls short of providing the comprehensive security and privacy that come with end-to-end encryption. Transparent Proxies: The Invisible Intermediary Unlike other proxies that require manual configuration by the user, a transparent proxy is one that you use without even knowing it. These are often implemented by organizations like corporations, schools, libraries, or public Wi-Fi providers. They intercept your connection and route it through a server without any action needed on your part. You might connect to your office Wi-Fi and browse the internet as usual, completely unaware that a transparent proxy is monitoring and filtering your activity in the background. The purpose of a transparent proxy is generally not to provide privacy or anonymity for the user. Instead, their primary goals are caching, authentication, and content filtering. For example, a school might use one to block access to social media or gaming websites. A company might use it to monitor employee internet usage and prevent access to malicious sites. A public Wi–Fi hotspot at a hotel might use one to enforce its terms of service or display a login portal. These proxies are tools for administrative control, not user-centric privacy. What is a VPN? Your Encrypted Tunnel on the Internet A VPN, or Virtual Private Network, takes a fundamentally different and more comprehensive approach to your online privacy and security. Instead of just acting as a middleman for a single application, a VPN creates a secure, encrypted "tunnel" between your entire
Easy Ways to Share Files Between Computers on a Network
In the modern digital age, the need to move data from one computer to another is a daily reality. Whether you're a student collaborating on a project, a professional managing documents across a home office, or a family wanting to share photos and videos, the days of relying solely on USB flash drives are long gone. The real power lies in leveraging your local network for fast, efficient, and secure data transfer. Knowing the different ways for how to share files between computers on a network can dramatically improve your workflow and save you a significant amount of time. This guide will walk you through everything from the simplest built-in tools on Windows and macOS to more advanced solutions, ensuring you find the perfect method for your needs. Understanding the Fundamentals of Network File Sharing Before diving into the specific "how-to" steps, it's crucial to grasp the basic concepts behind network file sharing. At its core, file sharing on a network means allowing one computer (the "host") to make specific files or folders available to other computers (the "clients") connected to the same local network. This network is often your home or office Wi-Fi, technically known as a Local Area Network (LAN). This process eliminates the physical transfer of storage devices, creating a seamless and integrated digital environment where data flows freely and securely between your machines. The primary benefit of this method is speed and convenience. Transferring large files, such as high-resolution videos or extensive project folders, over a local network is significantly faster than uploading them to the internet and then downloading them on another device. Furthermore, it centralizes access. Instead of having multiple versions of the same file scattered across different computers, you can maintain a single, up-to-date version in a shared location that everyone can access and, if permissions are granted, modify. This is essential for collaborative work and maintaining data integrity. To get started, you need a few key components. First, all computers must be connected to the same network, either through Wi-Fi or an Ethernet cable. Second, you'll need the administrative credentials (username and password) for the computers involved to adjust sharing settings. Finally, you need to ensure the network profile on your computers (especially on Windows) is set to "Private" or "Home" rather than "Public." A "Public" profile drastically restricts discovery and sharing for security reasons, which is great for a coffee shop but prohibitive for your trusted home or office network. Method 1: Using Your Operating System's Built-in Sharing Features The most direct and accessible way to share files is by using the native tools built directly into your computer's operating system. Both Windows and macOS have robust, user-friendly features designed for this exact purpose. This method is ideal for users who need a quick and straightforward solution without installing any third-party software. It leverages a protocol called Server Message Block (SMB), which has become the standard for local network file sharing across different platforms. Using the built-in OS features is perfect for home networks or small offices where you have a limited number of trusted devices. It gives you granular control over who can access your files and what they can do with them. You can set permissions for specific users, allowing some to only read the files (preventing accidental deletion or modification) while granting others full read-and-write access for collaborative editing. This level of control is essential for protecting your data while still enabling efficient sharing. The setup process is generally a one-time affair. Once a folder is designated as "shared," it remains accessible to other computers on the network as long as the host computer is turned on and connected. This creates a persistent shared drive that feels like a natural extension of each computer's own storage, making the entire process feel intuitive and integrated into your daily workflow. Sharing Files on a Windows Network Windows has refined its file-sharing process over the years, making it incredibly simple in Windows 10 and 11. The entire system is integrated into the File Explorer. To start, navigate to the folder you wish to share. Right-click on the folder and select Properties. In the Properties window, click on the Sharing tab. For the simplest method, click the "Share…" button. This opens a dialog where you can choose which user accounts can access the folder. You can add "Everyone" for easy access on a trusted network, or select specific user accounts for more security. Next to each user, you can set the permission level to either Read (users can view and copy files) or Read/Write (users can also add, modify, and delete files). Once you've made your selections, click "Share" and Windows will provide you with the network path to your shared folder. For more advanced options, use the "Advanced Sharing…" button on the Sharing tab. This allows you to set a custom share name, limit the number of simultaneous users, and manage permissions in a more detailed way. Once a folder is shared, another Windows user on the same network can access it by opening File Explorer, clicking on Network in the left-hand navigation pane, and locating the host computer's name. Double-clicking it will reveal all the folders it is currently sharing. Sharing Files on a macOS Network Apple's macOS also makes local file sharing straightforward, though the settings are located in System Settings (or System Preferences on older versions) rather than directly in the Finder. First, open System Settings and go to General > Sharing. Here, you'll see a list of services you can enable. Toggle the switch for File Sharing. Once enabled, you can click the small "i" (info) icon next to the toggle for more options. In this menu, you can add specific folders to your "Shared Folders" list by clicking the "+" button. You can also manage which users have access under the "Users" list, assigning them permissions like Read Only, Write Only, or Read & Write. By default, your "Public" folder is often shared so that

What Kind of Data Does a VPN Encrypt? The Full Answer
In today's hyper-connected world, our digital footprint is larger than ever. From online banking and shopping to simple web browsing and private messaging, we transmit a staggering amount of personal information across the internet every second. This raises a critical and increasingly common question for anyone concerned about their online privacy and security. You know you need protection, and you've heard a VPN is the answer, but the specifics can be murky. So, what kind of data does a VPN encrypt? The answer is more comprehensive than you might think, forming a digital shield around your most sensitive online activities. It's not just about hiding one or two things; it's about encrypting the entire data stream leaving your device, making it unreadable to prying eyes. The Core Function: How VPN Encryption Creates a Secure Tunnel At its heart, a Virtual Private Network (VPN) is a service that creates a secure, encrypted connection—often called a "tunnel"—between your device (like a computer, smartphone, or tablet) and a remote server operated by the VPN provider. Think of the regular internet as a public highway where anyone with the right tools, like your Internet Service Provider (ISP), government agencies, or hackers on a public Wi-fi network, can see the "postcards" of data you're sending and receiving. They can see where you're going (the websites you visit) and get a general idea of what you're doing. A VPN changes this postcard into a locked, armored steel box. This "tunneling" process is the cornerstone of VPN security. When you connect to a VPN, it uses a tunneling protocol to encapsulate each data packet your device sends. This means it takes your original data packet and wraps it inside another data packet. This outer packet is then encrypted before it leaves your device. Consequently, anyone trying to intercept your traffic won't see the original data or its intended destination. They will only see an unbreakable stream of gibberish traveling from your device to a single destination: the VPN server. This process effectively hides your online activities from your local network administrator and your ISP. Once your encrypted data reaches the VPN server, the server decrypts it and sends it on to its final destination—the website, app, or online service you wanted to access. The response from that service is then sent back to the VPN server, which encrypts it again before sending it back through the secure tunnel to your device. To the outside world, it appears as though all your internet traffic is originating from the VPN server, not your actual location. This two-way encryption is what provides both privacy and security, forming the fundamental layer of protection that a VPN offers. A Deep Dive into the Data Types Protected by a VPN Understanding the concept of an encrypted tunnel is one thing, but knowing the specific types of data it protects is what truly demonstrates a VPN's value. The encryption isn't selective; it’s a comprehensive shield that covers a wide array of information that would otherwise be exposed. From your digital identity to your most casual browsing habits, a VPN works tirelessly to keep it all private. Your IP Address and Geolocation Your Internet Protocol (IP) address is one of the most revealing pieces of information you broadcast online. It’s a unique numerical label assigned to your device by your ISP, and it acts like a digital home address. Without a VPN, every website you visit, every app you use, and every online service you connect to can see your real IP address. This allows them to determine your approximate physical location (city and country), your ISP, and track your activity across different sessions and websites. This data is a goldmine for advertisers, data brokers, and potentially malicious actors. A VPN's primary and most effective function is to mask your real IP address. When you connect to a VPN server, your original IP is hidden and replaced with the IP address of that server. If you are in London and connect to a VPN server in Tokyo, every website you visit will believe you are accessing it from Japan. This process, known as IP masking, is fundamental to online privacy. It prevents websites from tracking your real location, helps you bypass censorship and geo-restrictions (like accessing your home country's streaming library while abroad), and makes it significantly harder for third parties to build a profile of your online behavior based on your digital address. Your true digital identity is effectively cloaked. Browsing History and Web Traffic Without a VPN, your ISP has a front-row seat to your entire browsing history. They can see every website you visit, how long you stay there, the articles you read, and the videos you watch. This is possible because your device sends DNS (Domain Name System) requests to your ISP's servers to translate human-readable website names (like google.com) into machine-readable IP addresses. Your ISP can log these requests, creating a detailed and permanent record of your online life. This information can be sold to marketers, handed over to government agencies, or used to throttle your connection speed for certain activities like streaming or torrenting. A VPN encrypts this data stream entirely, including your DNS requests. A trustworthy VPN service will operate its own private DNS servers, meaning your requests to visit a website are sent through the encrypted tunnel to the VPN's DNS server, not your ISP's. This prevents your ISP from seeing which websites you are visiting. All they can see is that you are connected to a VPN server and that there is encrypted data flowing back and forth. The specific URLs, the content on the pages, and any information you submit in non-HTTPS forms are all scrambled and unreadable to your ISP or any other snoop on the network. This ensures your browsing activity remains truly private. Data Transmitted Over Unsecured Public Wi-Fi Public Wi-Fi networks found in cafes, airports, hotels, and libraries are notoriously insecure. They are a prime hunting ground for cybercriminals who

Analyzing Recent Major Cyber Attacks: Case Studies
In an age where digital infrastructure is the backbone of the global economy, the shadow of cybercrime looms larger than ever. The sophistication, scale, and audacity of threat actors have evolved dramatically, transforming digital vulnerabilities into real-world crises. Understanding the anatomy of these digital threats is no longer a niche concern for IT departments but a critical necessity for leaders, policymakers, and the public alike. Analyzing examples of recent major cyber attacks provides invaluable lessons, revealing patterns in attack vectors, the devastating consequences of a breach, and the urgent need for a more resilient and proactive security posture. These case studies serve as a stark reminder that in the digital realm, preparedness is the only true defense. The New Era of Cyber Warfare: Nation-State Espionage and Supply Chain Attacks In recent years, the cyber threat landscape has shifted from isolated incidents to highly coordinated, far-reaching campaigns, often sponsored or conducted by nation-state actors. The primary goal has expanded beyond simple financial gain to include espionage, intellectual property theft, and geopolitical destabilization. The most insidious of these strategies is the supply chain attack, where attackers compromise a trusted third-party vendor to gain access to a multitude of downstream targets. This method is exceptionally effective because it bypasses the direct defenses of the ultimate target, exploiting the inherent trust in the software and services businesses rely on daily. These attacks are characterized by their stealth, patience, and complexity. Attackers may lie dormant within a network for months, meticulously mapping systems and escalating privileges before executing their final objective. This long-term approach, known as an Advanced Persistent Threat (APT), is a hallmark of state-sponsored groups who have the resources and motivation to conduct sustained campaigns. The impact of a successful supply chain attack can be catastrophic, affecting thousands of organizations simultaneously and undermining the integrity of the entire digital ecosystem. The response to such incidents is equally complex, involving international diplomacy, technical forensics, and a massive, coordinated effort to patch and remediate affected systems. These attacks have served as a global wake-up call, forcing organizations and governments to fundamentally rethink their approach to security. The focus has shifted from perimeter defense to assuming a breach is inevitable, leading to the rise of concepts like Zero Trust architecture and the critical importance of vendor risk management. The SolarWinds Attack (SUNBURST): A Supply Chain Nightmare The SolarWinds attack, discovered in late 2020, is arguably the most significant supply chain attack in history. It was a masterclass in espionage executed with military precision. The attackers, widely attributed to a Russian state-sponsored group known as "Cozy Bear" or APT29, compromised the software build environment of SolarWinds, a prominent provider of IT management software. They ingeniously inserted a malicious backdoor into a legitimate software update for the company's Orion Platform. This meant that when customers downloaded and installed the trusted update, they were unknowingly installing a powerful espionage tool. This Trojanized update, containing the malware dubbed SUNBURST, was distributed to as many as 18,000 SolarWinds customers. Among the victims were numerous Fortune 500 companies and, most alarmingly, high-level U.S. government agencies, including the Departments of Treasury, Commerce, State, and Homeland Security. Once inside a network, the SUNBURST malware would lay dormant for weeks before "calling home" to a command-and-control server. From there, the attackers could selectively deploy a second stage of more advanced malware on high-value targets, allowing them to exfiltrate data, spy on internal communications, and gain deep, persistent access. The Log4Shell Vulnerability: A Ticking Time Bomb Unlike a targeted attack, Log4Shell was a vulnerability—a catastrophic flaw in a widely used piece of open-source software. Disclosed in December 2021, the vulnerability (officially CVE-2021-44228) existed in Apache Log4j, a Java-based logging utility used in countless applications and services, from enterprise software to online games like Minecraft. It was a remote code execution (RCE) vulnerability, meaning an attacker could trick an application into running any code they wanted simply by sending a malicious string of text that the application would then log. The ubiquity of Log4j made this a digital pandemic. Security teams scrambled to identify and patch every single instance of the vulnerable library across their entire technology stack, a monumental task. Meanwhile, threat actors of all kinds—from opportunistic crypto-miners to sophisticated ransomware gangs and nation-state spies—began to exploit it en masse. The ease of exploitation, combined with the difficulty of detection and remediation, made Log4Shell one of the most severe cybersecurity crises of the modern era. It underscored the fragility of the software supply chain and our collective reliance on shared, open-source components. Crippling Infrastructure: The Rise of Ransomware-as-a-Service (RaaS) Ransomware has evolved from a nuisance to a national security threat. The business model behind it has matured into Ransomware-as-a-Service (RaaS), a dark-web-based franchise model where ransomware developers lease their malicious software to "affiliates." These affiliates then conduct attacks and share a percentage of the ransom profits with the developers. This has dramatically lowered the barrier to entry, allowing less-skilled cybercriminals to launch devastating attacks against well-defended targets. The primary targets for these RaaS gangs are organizations that cannot afford downtime, such as hospitals, schools, and critical infrastructure providers. The attackers' tactics have also become more ruthless. It's no longer just about encrypting data; it's about double extortion. Before encrypting the files, attackers first exfiltrate large amounts of sensitive data. If the victim refuses to pay the ransom to decrypt their files, the attackers then threaten to publish the stolen data publicly, adding immense pressure and reputational damage to the financial and operational crisis. This escalation has forced organizations and governments to take the threat far more seriously. Law enforcement agencies have increased their efforts to disrupt RaaS operations, targeting their infrastructure and financial networks. However, the decentralized and often anonymous nature of these groups, many of which operate from jurisdictions that turn a blind eye, makes them an incredibly difficult threat to eradicate completely. The Colonial Pipeline Shutdown: A Wake-Up Call for Critical Infrastructure In May 2021, the United States witnessed the real-world consequences of
How to Set Up a VPN on a Router: The Ultimate Guide
In an age where our homes are brimming with internet-connected devices—from smartphones and laptops to smart TVs and gaming consoles—ensuring an encrypted and private connection for every single one can seem like a logistical nightmare. Manually installing a VPN on each device is tedious and, in some cases, impossible. This is where a router-level VPN saves the day, creating a single, secure umbrella for your entire home network. Learning how to set up a vpn on a router is one of the most powerful steps you can take to reclaim your digital privacy, secure your data, and unlock a world of unrestricted content. This ultimate guide will walk you through the entire process, from understanding the benefits to troubleshooting common issues, ensuring you're equipped with the knowledge to fortify your digital fortress. Why Set Up a VPN on Your Router? The Core Benefits Before diving into the technical steps, it’s crucial to understand why installing a VPN directly on your router is a game-changer for your home network's security and functionality. Unlike a typical VPN application that only protects the device it's installed on, a router-level VPN extends its protective shield to every device that connects to your Wi-Fi. This creates an "always-on" security environment, meaning you are protected the moment a device connects, without ever needing to remember to launch an app or click a "connect" button. This seamless, comprehensive protection is the primary advantage. The benefits extend far beyond convenience. One of the most significant advantages is the ability to protect devices that don't natively support VPNs. Think about your smart TV, Apple TV, Roku, PlayStation, Xbox, or even IoT (Internet of Things) devices like smart speakers and security cameras. These gadgets often handle sensitive data or your viewing habits but lack the functionality to install a VPN client. By routing their traffic through a VPN-enabled router, you effectively grant them the same level of encryption and privacy as your computer or smartphone, protecting them from ISP snooping and potential cyber threats. Furthermore, most VPN providers impose a limit on the number of simultaneous connections you can have under a single subscription, typically ranging from five to ten devices. In a modern household, this limit is easily reached. A VPN-configured router cleverly bypasses this restriction. To your VPN provider, your entire home network—no matter if it's 5 or 25 devices—appears as just one single connection. This allows you to secure an unlimited number of gadgets under one VPN subscription, providing immense value and simplifying your digital security management. Pre-Installation Checklist: What You Need Before You Begin Proper preparation is the key to a smooth and successful router VPN setup. Rushing into the process without the right hardware and information can lead to frustration and wasted time. Before you attempt to configure anything, it's essential to gather all the necessary components. This checklist ensures you have everything on hand, turning a potentially complex task into a straightforward procedure. Think of this as your mise en place for network security. A VPN-Compatible Router This is the most critical component. Not all routers are created equal, and many inexpensive, ISP-provided routers lack the necessary processing power or firmware features to handle a VPN connection. You generally have two options: a router that comes with VPN client functionality built-in, or a router that can be "flashed" with custom firmware. Routers from brands like ASUS (especially those with the ASUSWRT firmware), high-end Netgear, and Linksys often include a built-in OpenVPN client. These are the easiest to configure. Alternatively, you can purchase a router that is compatible with open-source firmware like DD-WRT, Tomato, or OpenWrt</strong>. This firmware replaces the manufacturer's stock software and unlocks advanced features, including robust VPN client support. Flashing custom firmware is a more advanced route but offers greater flexibility and control. If you're buying a new router specifically for this purpose, check its specifications for "VPN Client Mode" or its compatibility with the aforementioned custom firmware. An Active VPN Subscription Your router is just the hardware; the VPN service is the engine that encrypts and reroutes your traffic. You need an active subscription with a reputable VPN provider that supports router-level connections. When choosing a VPN for this purpose, look for a provider that: Offers OpenVPN or WireGuard configuration files: These are the standard protocols used for manual router setups. A provider that gives you easy access to `.ovpn` (for OpenVPN) or `.conf` (for WireGuard) files is essential. Has a large server network: This gives you more options for finding a fast and stable connection. Provides clear router setup guides: Top-tier providers like ExpressVPN, NordVPN, and Surfshark offer extensive documentation and even custom firmware to simplify the process. Has strong performance: Running a VPN on a router introduces some processing overhead. A fast, well-optimized VPN service will minimize speed loss. Essential Files and Information Once you have your compatible router and VPN subscription, you need to gather the specific credentials and files from your VPN provider's website. Log in to your account dashboard and look for a section dedicated to manual setup or router configuration. You will typically need to download an OpenVPN configuration file (`.ovpn`) for your desired server location. This small text file contains all the necessary directives, certificates, and keys to establish a connection to that specific server. In addition to the file, you will need your VPN service username and password. It's important to note that these credentials are often different from your regular login details for the website; they are specifically generated for manual protocol setups. Keep these files and credentials handy, as you'll need to input them into your router's interface. How to Set Up a VPN on a Router: Two Main Methods With your preparation complete, it's time to get to the core of the task. There are two primary pathways for setting up a VPN on a router, and the one you choose will depend entirely on the type of router you have. The first method is for routers that have
How to Assign a Static IP Address: A Beginner’s Guide
Of course. As an SEO expert, I will create a unique, engaging, and SEO-optimized article based on your instructions. The content will be structured for readability and search engine visibility, adhering to the latest best practices. — Navigating the world of home and office networking can sometimes feel like learning a new language. You hear terms like IP address, DHCP, and router, and it’s easy to feel overwhelmed. However, understanding these components is the key to unlocking a more stable and reliable internet experience for specific tasks. While most devices work perfectly fine with a changing address, there are many situations where a fixed, unchanging address is crucial. This guide is designed to demystify one of the most useful networking tasks for a power user: learning how to assign a static IP address. We will walk you through the what, why, and how, ensuring you can confidently manage your own network devices. Understanding IP Addresses: Dynamic vs. Static Before diving into the “how,” it’s essential to grasp the fundamental concept of an IP (Internet Protocol) address and the two primary types you’ll encounter. Think of an IP address as a unique mailing address for a device on a network. Just as your home has a specific address so mail can find you, every device connected to the internet—your computer, smartphone, smart TV, or gaming console—needs an IP address to send and receive data correctly. Without it, your router and the wider internet would have no idea where to send the website data you requested or the stream for the movie you’re watching. These addresses are the bedrock of all internet communication. Most devices on your home network use a dynamic IP address. This is the default for a reason: it’s incredibly efficient and hands-off. Your router runs a service called DHCP (Dynamic Host Configuration Protocol), which acts like a friendly hotel concierge. When a new device connects to your Wi-Fi, it asks the router for an IP address. The DHCP server looks at its list of available addresses and “leases” one to the device for a certain period. When the lease expires or the device disconnects, that address is returned to the pool for another device to use. This system is perfect for guest devices and personal gadgets because it requires zero configuration from the user. In contrast, a static IP address is a fixed, permanent address that you manually assign to a device. It doesn’t change. Going back to our analogy, it’s like owning a house at a specific address rather than staying in different hotel rooms. You are telling your network, “This specific device—be it a server, a printer, or a security camera—will always be found at this exact address.” This method requires a one-time manual setup, but it provides a level of predictability and reliability that dynamic addresses can’t guarantee. This stability is the primary reason why someone would choose to set up a static IP for certain devices on their local network. Why Would You Need a Static IP Address? The convenience of dynamic IPs is undeniable for everyday browsing, but their changing nature can create significant problems for certain applications. If you have a device or service that other devices need to connect to consistently, having its address change unexpectedly can break the connection. Imagine trying to send a package to a friend whose home address changes every few days; you would constantly have to look up their new location. A static IP address eliminates this issue by providing a permanent, reliable point of contact on your network. The most common use case is for hosting any type of server. If you run a file server to store and share documents across your home, a Plex media server to stream your movie collection, or a game server for you and your friends to play on, you need a static IP. When you configure other computers to access that server, you point them to its IP address. If that address changes, the connection is lost until you reconfigure everything with the new one. A static IP ensures your server is always accessible at the same address, providing seamless and uninterrupted service. Beyond servers, several other scenarios benefit greatly from a static IP. Network Printers: If multiple people in an office or home connect to a single printer, a static IP prevents the connection from breaking. Remote Access: For accessing security cameras, a smart home hub, or your desktop computer remotely, a static IP ensures you can always find and connect to the device from anywhere in the world (with proper configuration like port forwarding). Port Forwarding: Many online games and applications require you to forward specific network ports on your router to a device. This process works far more reliably when the device’s internal IP address is static. Troubleshooting: When diagnosing network issues, having devices with fixed addresses can make it much easier to identify which device is causing problems. Preparing to Assign a Static IP Address Before you can assign a static IP, you need to do a bit of reconnaissance on your own network. Simply picking a random number won’t work and will likely cause an “IP conflict,” where two devices try to use the same address, resulting in neither being able to connect properly. Preparation involves two key steps: gathering your current network information and intelligently choosing an available IP address that won’t interfere with your router’s automatic assignments. This preparatory phase is the most critical part of the process. Having the correct information on hand before you start changing settings will make the entire process smooth and error-free. You will need to find four key pieces of information: your current IP address (to know the format), the Subnet Mask, the Default Gateway (your router’s address), and the DNS Servers your network uses. All of this can be found with a simple command. Finding Your Current Network Information The easiest way to get all the necessary

What Is Ethical Hacking? A Look at Its Core Purpose
In today's hyper-connected world, news of massive data breaches and crippling cyberattacks has become alarmingly common. We hear about hackers stealing customer data, shutting down critical infrastructure, and causing billions in damages. This has painted the word "hacker" with a broad, negative brush. However, not all hackers wear a "black hat." A growing and vital profession exists on the opposite side of the spectrum, one that uses the same skills for a completely different reason: to protect and defend. This article will provide a comprehensive answer to the question of what is ethical hacking and its purpose, exploring how these "white hat" hackers have become the digital immune system for modern organizations. Unpacking Ethical Hacking: More Than Just "Good Hacking" At its core, ethical hacking is the authorized and legal practice of attempting to penetrate computer systems, networks, applications, or other digital assets to discover security vulnerabilities that a malicious attacker could potentially exploit. The key difference between an ethical hacker and a malicious one lies in one critical word: permission. Ethical hackers, often referred to as "white hat hackers," operate with the explicit consent of the organization they are testing. Their goal is not to cause harm, steal information, or disrupt services, but to identify weaknesses and provide recommendations to strengthen security before real attackers find them. Think of an ethical hacker as a digital security consultant hired to test the locks on your house. You wouldn't want a random stranger trying to pick your locks and break in. However, you might hire a certified locksmith or a security expert to test every door, window, and potential entry point to tell you where you are vulnerable. They would document their findings—a weak deadbolt, a window that doesn't latch properly, an easy-to-guess garage code—and give you a detailed report on how to fix these issues. This is precisely what an ethical hacker does, but in the vast and complex world of digital systems. This proactive approach fundamentally distinguishes ethical hacking from its nefarious counterpart. While a malicious "black hat" hacker seeks to exploit vulnerabilities for personal gain, financial theft, espionage, or notoriety, a white hat hacker operates within a strict code of conduct and a defined scope. Their work is a crucial component of a comprehensive cybersecurity strategy, providing a real-world assessment of an organization's defenses. It's a simulated battle to prevent a real war. The Core Purpose: Why Ethical Hacking is Indispensable The fundamental purpose of ethical hacking is to proactively identify and remediate security flaws from an attacker's perspective. It moves an organization's security from a purely defensive, reactive posture to a proactive, offensive one. Instead of waiting for an attack to happen and then dealing with the fallout, organizations use ethical hacking to find and patch the holes in their armor first. This preventative maintenance is invaluable in an era where the cost and impact of a single data breach can be devastating for a business of any size. This practice is indispensable for protecting an organization's most valuable assets: its data. This includes sensitive customer information (like credit card numbers and personal details), proprietary intellectual property, confidential financial records, and strategic business plans. By simulating the attacks that cybercriminals would use, ethical hackers can verify that the security controls in place are working as intended and discover where they are failing. This allows businesses to prioritize their security investments and focus on fixing the most critical vulnerabilities that pose the greatest risk. Furthermore, ethical hacking plays a significant role in regulatory compliance. Many industries are governed by strict data protection regulations, such as the General Data Protection Regulation (GDPR) in Europe, the Health Insurance Portability and Accountability Act (HIPAA) in healthcare, and the Payment Card Industry Data Security Standard (PCI DSS) for financial transactions. These standards often mandate regular security assessments and penetration testing to ensure that organizations are diligently protecting sensitive data. Ethical hacking provides the tangible proof required to meet these compliance obligations and avoid hefty fines. Strengthening Overall Security Posture Ethical hacking provides an unparalleled, real-world stress test for an organization’s entire security infrastructure. A company can invest millions in firewalls, intrusion detection systems, and antivirus software, but these are only effective if they are configured correctly and there are no gaps in the defense. Ethical hackers test these systems from the outside in, just as a real attacker would, identifying misconfigurations, unpatched software, and weak protocols that automated scanners might miss. The result of this process is a tangible roadmap for improvement. By understanding exactly how an attacker could breach their defenses, security teams can implement targeted fixes. This might involve patching a specific software vulnerability, strengthening password policies, improving network segmentation, or providing additional training to employees on phishing attacks. This continuous cycle of testing and hardening drastically reduces the organization's "attack surface"—the sum of all possible entry points for a malicious actor—making it a much harder target for cybercriminals. Preventing Financial and Reputational Damage The fallout from a successful cyberattack extends far beyond the immediate technical disruption. The financial costs are staggering, encompassing regulatory fines, legal fees, customer compensation, and the cost of remediation and recovery. According to IBM’s Cost of a Data Breach Report 2023, the average global cost of a data breach reached an all-time high of $4.45 million. This figure doesn’t even account for the long-term, often unquantifiable damage to an organization’s reputation. When customers entrust a company with their data, they expect it to be kept safe. A breach shatters that trust, often permanently. Customers may flee to competitors, and the brand's reputation can be tarnished for years, affecting future sales and partnerships. Ethical hacking serves as a crucial insurance policy against this catastrophic outcome. By investing a fraction of the potential cost of a breach into proactive testing, organizations can prevent these devastating events from ever occurring, thereby safeguarding both their bottom line and their hard-won reputation in the marketplace. The Different Colors of the Hacking World: White, Black, and Grey Hats In the
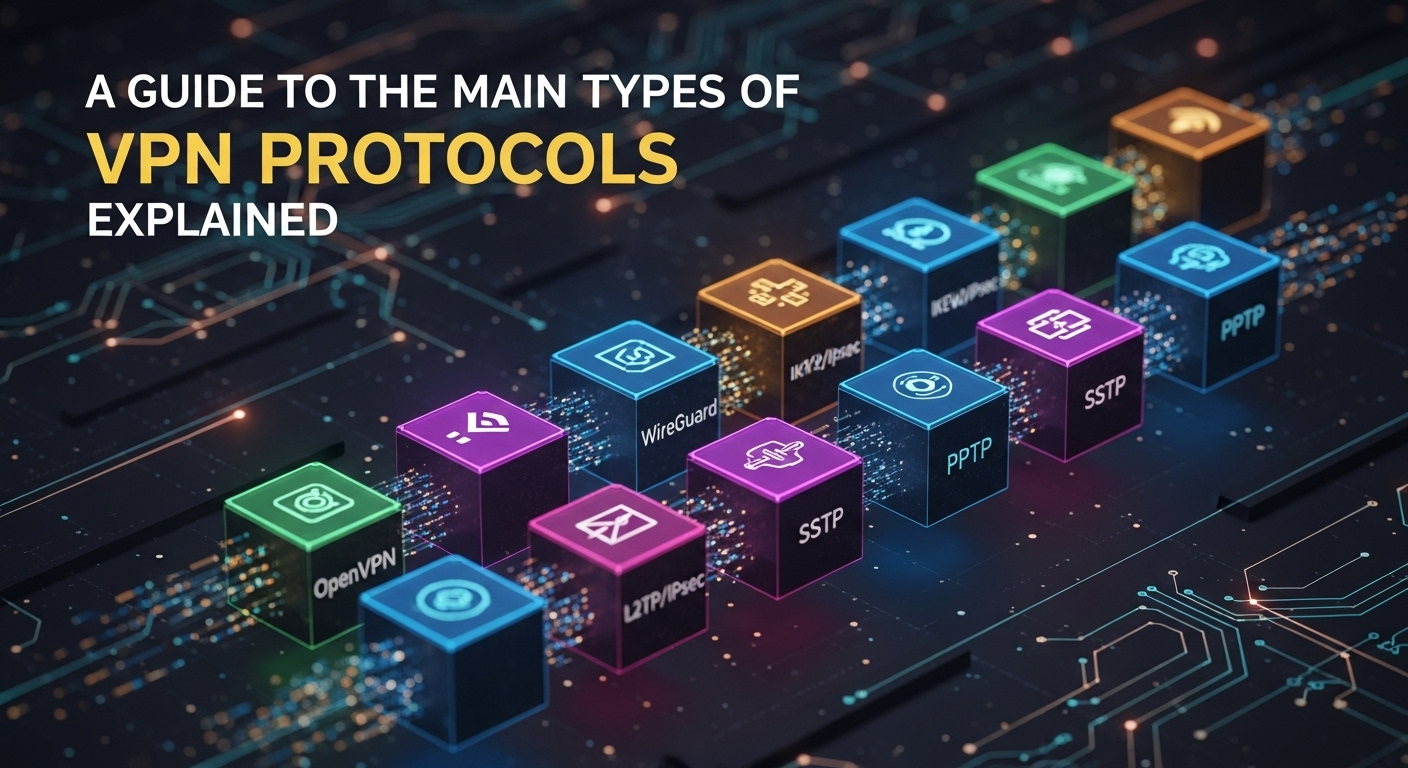
A Guide to the Main Types of VPN Protocols Explained
Navigating the world of online privacy can feel like learning a new language, filled with acronyms and technical jargon. At the heart of every Virtual Private Network (VPN) service lies a critical component that determines its speed, security, and reliability: the VPN protocol. Think of a protocol as the engine of your VPN; it's the set of rules that dictates how your data is encrypted and routed from your device to the VPN server. Understanding the fundamental differences between them is key to choosing a service that truly meets your needs, whether you're a privacy advocate, a streaming enthusiast, or a remote worker. This comprehensive guide provides a deep dive into the main types of vpn protocols explained, breaking down their strengths, weaknesses, and ideal use cases to empower you to take control of your digital security. What Are VPN Protocols and Why Do They Matter? Before we dissect the individual protocols, it's crucial to understand their role in the VPN ecosystem. A VPN protocol is essentially a set of instructions that governs the creation and maintenance of the secure connection, or "tunnel," between your device and the VPN server. It defines how authentication happens (proving you are who you say you are), how the encryption is applied (scrambling your data), and how the data is packaged and transported through the internet. Without a protocol, a VPN is just a network of servers with no secure way to connect to them. The choice of protocol has a direct and significant impact on your user experience. It's a constant balancing act between three core pillars: speed, security, and stability. Some protocols are built like a fortress, using incredibly strong encryption that might slightly slow down your connection. Others are designed to be lightweight and fast, perfect for streaming or gaming but perhaps not the best choice for handling highly sensitive financial data. The right protocol for you depends entirely on what you prioritize. Ultimately, understanding VPN protocols matters because it allows you to move beyond marketing claims and make an informed decision. A VPN provider might boast about its massive server network, but if it only offers an outdated and insecure protocol, that network is built on a weak foundation. By learning the difference between a protocol like WireGuard and an obsolete one like PPTP, you can properly evaluate a VPN service's security posture and ensure you're getting the protection you're paying for. The Modern Champions: OpenVPN and WireGuard In the contemporary VPN landscape, two protocols stand head and shoulders above the rest: OpenVPN and WireGuard. They represent the current pinnacle of VPN technology, each with a passionate following and distinct advantages. Most top-tier VPN providers offer both, allowing users to switch between them based on their immediate needs. These two are often the default recommendation for the vast majority of users due to their excellent blend of modern security and performance. OpenVPN has long been the undisputed king, a battle-hardened veteran known for its unwavering security and reliability. For over two decades, it has served as the industry's gold standard. WireGuard, on the other hand, is the lean and fast-moving challenger. It’s a relatively new protocol that has taken the industry by storm with its groundbreaking speed and elegant simplicity, quickly becoming a favorite for performance-critical tasks. Choosing between them is not about picking a "winner" but understanding their design philosophies. OpenVPN is about maximum security and configurability, while WireGuard is about maximum speed and simplicity. We will explore each in detail to help you understand which modern champion is the right fit for your digital life. OpenVPN: The Gold Standard of Security First released in 2001, OpenVPN is an open-source protocol that has become the benchmark against which all other protocols are measured. Its "open-source" nature is a significant advantage; it means its source code is publicly available for anyone to inspect for vulnerabilities. This transparency has led to a global community of security experts constantly auditing and strengthening the code, making it incredibly trustworthy and secure. OpenVPN uses the robust OpenSSL library for encryption and can be configured to use a wide variety of encryption ciphers, including the industry-standard AES-256. The protocol's greatest strengths are its immense flexibility and security. It can run over two different transport protocols: TCP (Transmission Control Protocol) and UDP (User Datagram Protocol). OpenVPN UDP: This is the default and preferred option. It's faster because it doesn't require acknowledgment for every packet sent, making it ideal for streaming, gaming, and general browsing. OpenVPN TCP: This option is slightly slower but more reliable. It ensures every packet is received in the correct order, and it can be configured to run on port 443, the same port used for standard HTTPS traffic. This makes it exceptionally good at bypassing restrictive firewalls in countries or on networks that block VPNs. Its main drawbacks are its relatively heavy code base, which can result in slightly slower speeds compared to newer protocols, and the complexity of a manual setup, although this is a non-issue when using a commercial VPN provider's app. WireGuard: The Lean, Mean, Speed Machine WireGuard is the exciting newcomer that has fundamentally changed the VPN protocol conversation. Designed from the ground up to be a simpler, faster, and more secure alternative to older protocols like IPsec and OpenVPN, its defining feature is its streamlined codebase. While OpenVPN has hundreds of thousands of lines of code, WireGuard has only about 4,000 lines. This extreme simplicity makes it far easier for security researchers to audit, dramatically reducing the potential for hidden vulnerabilities. The primary advantage of WireGuard is its blazing-fast speed and near-instantaneous connection times. It uses state-of-the-art cryptography, such as the ChaCha20 cipher, which is less computationally intensive than AES, allowing for faster throughput and better battery life on mobile devices. This performance boost makes it the undisputed champion for activities like 4K streaming, online gaming, and large file downloads. Its lean design also contributes to greater stability, especially on mobile networks. However, WireGuard is not
The Ultimate Guide to VPN for Remote Work Security
In an era where the traditional office has expanded to include living rooms, coffee shops, and co-working spaces across the globe, the conversation around digital security has never been more critical. The flexibility of remote work brings undeniable benefits, but it also opens up a new frontier of vulnerabilities that cybercriminals are eager to exploit. Protecting sensitive company data and personal information is no longer just the IT department's responsibility; it's a crucial part of every remote worker's daily routine. This is where a robust VPN for remote work security transitions from a "nice-to-have" tech accessory to an absolutely essential tool for professional survival and integrity. Understanding the 'Why': The Critical Need for VPNs in a Remote World The global shift towards remote and hybrid work models is not a fleeting trend but a permanent evolution in the professional landscape. Companies and employees alike have embraced the autonomy and efficiency it offers. However, this distributed workforce model fundamentally alters the security perimeter. Instead of a single, fortified office network, companies now rely on dozens, hundreds, or even thousands of individual, often unsecured, home networks. This decentralization creates a significantly larger attack surface for malicious actors. Each remote worker's connection is a potential gateway into the corporate network. Home Wi-Fi routers, often configured with default passwords and outdated firmware, are low-hanging fruit for hackers. Public networks, like those found in cafes or airports, are even more perilous, acting as hunting grounds for data thieves. Without a protective layer, every email sent, every file downloaded, and every password entered while connected to these networks is at risk of interception. The potential consequences range from individual identity theft to catastrophic corporate data breaches, costing millions in damages and eroding customer trust. This is precisely the problem a Virtual Private Network (VPN) is designed to solve. It acts as a secure, encrypted tunnel for your internet traffic, shielding it from prying eyes. By routing your connection through a private server, a VPN makes your online activities invisible to anyone on the same network, including cybercriminals, your Internet Service Provider (ISP), and opportunistic snoopers. For a remote workforce, a VPN isn't just about privacy; it's a foundational pillar of a secure and resilient remote work infrastructure, ensuring that business can continue securely, no matter where an employee logs on. What is a VPN and How Does it Bolster Remote Work Security? At its core, a VPN is a service that creates a secure and encrypted connection over a less secure network, such as the public internet. Imagine you are sending a valuable package through the mail. Without a VPN, it’s like sending that package in a clear, unlocked box. Anyone who handles it can see what’s inside and even tamper with it. Using a VPN is like placing that package inside a locked, opaque steel safe before mailing it. The safe (the VPN tunnel) travels through the same postal system (the internet), but no one can see what's inside or access its contents until it reaches its intended recipient with the correct key. This "digital safe" is created through two key processes: tunneling and encryption. Tunneling encapsulates your data packets within other packets before sending them across the internet. This creates a private 'tunnel' through the public network. More importantly, everything inside this tunnel is encrypted. This means the data is scrambled into an unreadable code. Even if a hacker managed to intercept your data, they would only see a jumble of nonsensical characters without the specific decryption key, which resides only on your device and the VPN server. A VPN also masks your real IP address, replacing it with the IP address of the VPN server you connect to, further anonymizing your online presence and location. For remote workers, the practical applications of this technology are immense. When you connect to your company’s servers to access sensitive files, a VPN ensures that the connection is completely private and secure, preventing man-in-the-middle attacks. When you're working from a hotel with notoriously insecure Wi-Fi, a VPN encrypts your entire session, protecting your login credentials, client communications, and proprietary data. It essentially recreates the security of a physical office network, allowing you to work from anywhere with confidence and peace of mind. The Core Components of VPN Security The strength of a VPN is determined by its underlying technology, primarily its encryption standards and tunneling protocols. These elements work in tandem to create the secure environment necessary for remote work. Understanding them helps in differentiating a robust, enterprise-grade VPN from a flimsy, consumer-grade one that offers a false sense of security. The gold standard for encryption today is AES (Advanced Encryption Standard) 256-bit encryption. This is the same level of encryption used by governments, militaries, and financial institutions worldwide to protect top-secret information. It is, for all practical purposes, unbreakable by brute force. When a VPN service advertises AES-256, it means your data is being scrambled with a key of such complexity that it would take the world's most powerful supercomputers billions of years to crack. For remote work security, settling for anything less is an unnecessary risk. Tunneling Protocols: The Highways of Your Data Tunneling protocols are the sets of rules that determine how your data tunnel is built and maintained. Different protocols offer varying balances of speed, stability, and security. OpenVPN is a highly versatile and secure open-source protocol, long considered the industry standard for its reliability. IKEv2/IPsec is known for its stability and speed, especially on mobile devices, as it can re-establish a connection quickly if you switch between Wi-Fi and cellular data. The newest major protocol, WireGuard, is a game-changer, offering blazing-fast speeds and top-tier security with a much leaner codebase, making it easier to audit and less prone to vulnerabilities. A quality VPN provider will offer a choice of these protocols to suit different needs. Essential Features Beyond the Basics Beyond core encryption and protocols, several features are non-negotiable for anyone serious about VPN for remote work security. A Kill Switch