In today’s digital age, securing your online privacy and data has become more important than ever. One effective way to protect your internet activity is by setting up a VPN (Virtual Private Network) on your router. This method allows you to encrypt all the traffic from your home network, ensuring that every device connected to it benefits from the same level of security. Whether you’re looking to bypass geo-restrictions, protect sensitive information, or hide your IP address, how to set up a vpn on a router is a practical solution that can simplify your digital security setup. This comprehensive guide will walk you through the process of configuring a VPN on your router, from choosing the right service to testing the connection for optimal performance.
Table of Contents
ToggleStep 1: Understand the Benefits of Using a Router-Based VPN
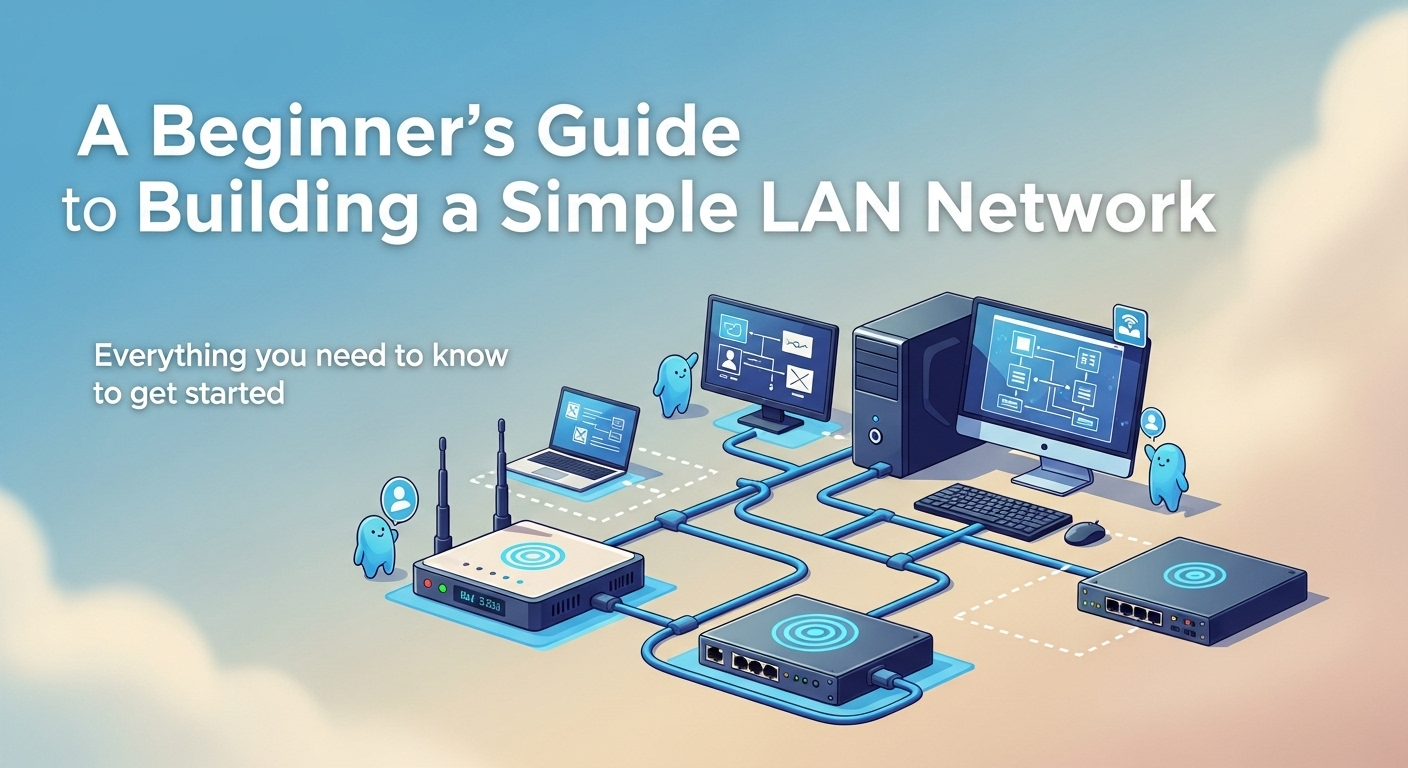
Setting up a VPN on your router offers several advantages over configuring it on individual devices. First, it provides end-to-end encryption for all data passing through your network, ensuring that your entire home or office setup is protected. This is particularly useful for households with multiple devices, as it eliminates the need to install the VPN on each one separately. Additionally, a router-based VPN can help you avoid IP address tracking, data monitoring, and internet censorship by masking your real location.
Another key benefit is network-wide security. When you connect a VPN to your router, all devices—whether smartphones, laptops, or smart TVs—automatically use the encrypted connection. This is especially important for users who may not be tech-savvy and want a straightforward way to protect their online activity. Furthermore, a router-based VPN can improve your internet speed and reduce latency, as it centralizes the connection rather than distributing it across devices.
Finally, a router-based VPN is ideal for remote work and online privacy. If you're working from home and need to access work resources securely, setting up a VPN on your router ensures that your connection is protected without requiring additional configuration. It also makes it easier to maintain consistent security settings** across your network, giving you peace of mind knowing that your data is safe from prying eyes.
Why Choose a Router-Based VPN?
1. Convenience A router-based VPN is easy to set up once, and it protects all devices connected to your network. This means you don’t have to repeat the process for every smartphone, tablet, or laptop. * Example: If you use a TP-Link or Netgear router, you can configure the VPN with just a few steps, and your Wi-Fi-connected devices will automatically benefit from the encrypted connection.
2. Cost-Effective Paying for a VPN subscription once covers all devices in your household. This is more efficient than purchasing separate plans for each device. * Statistik: According to a 2024 survey by PCMag, 68% of users prefer router-based VPN solutions for their ease of use and affordability.
3. Centralized Control Managing a VPN on your router gives you more control over network security. You can set up firewall rules, IP filtering, and data encryption from a single interface. * Perbandingan: | Feature | Router-Based VPN | Device-Based VPN | |———————-|———————|———————| | Setup Time | 15-30 minutes | 5-10 minutes per device | | Coverage | All devices on the network | Single device only | | Cost | One subscription | Multiple subscriptions | | Security Management | Centralized | Decentralized |
Step 2: Select a Compatible VPN Service Provider
Before you begin the setup process, it’s crucial to choose a VPN service that supports router configuration. Not all VPN providers offer router compatibility, so you need to verify this before purchasing a subscription. Some popular options that support router-based VPN setups include ExpressVPN, NordVPN, Surfshark, and CyberGhost. These services typically provide firmware for routers like DD-WRT or OpenWRT, making the process smoother for users.
When selecting a VPN provider, consider the following factors: – Compatibility: Ensure the VPN supports your router model (e.g., ASUS, Linksys, D-Link). – Speed: Look for a provider with fast connection speeds to avoid lag during online activities. – Security Features: Choose a VPN with strong encryption (such as AES-256), no logs policy, and multi-factor authentication. – Server Network: A larger server network allows for better performance and more options for bypassing geo-restrictions.
For example, ExpressVPN is known for its user-friendly interface and strong security protocols, making it a popular choice among users. On the other hand, NordVPN offers advanced features like double encryption and split tunneling, which may be ideal for those seeking maximum privacy.
Checking Router Compatibility
1. Identify Your Router Model Visit the manufacturer’s website to find the model number of your router. This will help you determine which VPN services support it. * Tip: Most modern routers (e.g., TP-Link, Netgear, ASUS) support OpenVPN or IKEv2 protocols, which are commonly used for router-based VPN setups.
2. Verify the Provider’s Router Support Search for the VPN provider’s router compatibility list. Some services offer firmware updates or apps for specific models, while others may require manual configuration. * Pertanyaan Umum: – Can I use any <strong>VPN</strong> on my router? Yes, but only if the VPN supports router configuration. Check the provider’s website or contact their customer support for confirmation.
3. Consider Additional Features Look for features like Kill Switch, DNS Leak Protection, and split tunneling to enhance your security and privacy. These tools ensure that your data remains protected even if the connection drops.
Step 3: Prepare Your Router and Access the Admin Panel
Before configuring the VPN on your router, ensure that it is connected to the internet and powered on. Next, you need to access the router’s admin panel to begin the setup. This is typically done by opening a web browser and entering the router’s IP address (e.g., `192.168.1.1` or `192.168.0.1`) in the address bar.
Once you’re on the admin panel, look for the Wireless or Advanced Settings section. Here, you’ll find options for configuring the VPN. Some routers have a dedicated VPN tab, while others require you to navigate to Advanced Settings > Network. If you’re unsure where to find these options, refer to the router’s user manual or search online for the specific model.
For wireless routers, you may need to enable WAN mode or Bridge mode before adding the VPN. This ensures that the VPN operates correctly and doesn’t interfere with your network connectivity. Additionally, make sure that your router’s firmware is up to date, as older versions may not support the latest VPN protocols.
Steps to Access the Admin Panel
1. Connect to the Router’s Wi-Fi Network Ensure your device is connected to the router’s Wi-Fi to access the admin panel.
2. Open a Web Browser Enter the router’s IP address (e.g., `192.168.1.1`) into the address bar.
3. Log In with Admin Credentials Input the default username and password (usually `admin` for both, or check the router’s label for the default credentials).
4. Navigate to the VPN Configuration Section Look for Advanced Settings or Network Settings to find the VPN configuration options.
Step 4: Configure the VPN Settings on Your Router
Now that you’ve accessed the admin panel, it’s time to configure the VPN settings. This process varies slightly depending on your router model and the VPN provider you’ve chosen. Most routers use a OpenVPN or IKEv2 protocol, which are widely supported by VPN services. Follow the steps below to set up the VPN on your router:

1. Select the VPN Protocol Choose between OpenVPN, IKEv2, or PPTP. OpenVPN is generally recommended for its strong security and compatibility, while IKEv2 is ideal for mobile devices and fast connections.
2. Enter the Server Address and Port Input the server address (e.g., `vpn.example.com`) and the port number (e.g., `1194` for OpenVPN) provided by your VPN provider. This information is usually found in the provider’s dashboard or configuration files.
3. Configure the VPN Credentials Enter the username and password for your VPN account. Some providers may also require a pre-shared key or certificates for additional security.
4. Set Up the VPN Tunnel Choose whether to enable split tunneling (which allows some traffic to bypass the VPN) or full tunneling (which encrypts all data). This depends on your privacy needs and internet usage patterns.
5. Save and Apply the Settings After configuring the VPN, save the changes and restart the router to apply the new settings. This ensures that the VPN connection is properly established.
Example Configuration for OpenVPN
– Server Address: `vpn.example.com` – Port: `1194` – Username: `your_username` – Password: `your_password` – Protocol: OpenVPN (TCP or UDP) – Encryption: AES-256 – Authentication: SHA256
Step 5: Connect to the VPN and Test the Network
After completing the configuration, your router should be connected to the VPN. To verify this, open a web browser and check your public IP address. If the VPN is working correctly, the IP address should now show the location of the VPN server instead of your original one.
You can also test the network speed to ensure that the VPN isn’t causing a noticeable slowdown. Use a speed testing tool like SpeedTest by Ookla to measure your internet speed before and after the VPN is activated. If the speed decreases significantly, consider switching to a different server location or protocol.
Additionally, check for DNS leaks by visiting a DNS leak testing website like DNS Leak Test. This will help you confirm that your router’s DNS settings are pointing to the VPN provider’s servers and not to your ISP’s DNS. If a DNS leak is detected, update the DNS settings in the admin panel to use the VPN provider’s DNS.
Tools for Testing the VPN Connection
– Public IP Checker: `https://www.whatismyip.com` – Speed Test Tool: `https://www.speedtest.net` – DNS Leak Test: `https://www.dnsleaktest.com` – Connection Monitor: Use the router’s built-in status page to see the VPN connection status.
Tips for Optimal Performance
– Choose the Closest Server Location to minimize latency and speed loss. – Use the UDP protocol for faster connections, unless you need reliable performance over unstable networks. – Enable the Kill Switch to ensure your data remains encrypted if the VPN connection drops.
Step 6: Customize Advanced VPN Settings (Optional)
If you want to enhance your security and privacy, you can customize additional VPN settings on your router. These options may vary depending on the router model and VPN provider, but some common customizations include:
1. Adjusting the Tunnel Mode Choose between TUN (for routing all traffic through the VPN) or TAP (for routing only specific traffic through the VPN). TUN is typically used for full encryption, while TAP is better for specific applications.
2. Enabling Multicast DNS (mDNS) Support This allows your router to support devices like Apple TVs and smart speakers that rely on mDNS for network discovery.
3. Setting Up a Split Tunneling Rule Define which applications or devices should bypass the VPN while others use it. This is useful for prioritizing certain traffic (e.g., streaming services) while still securing your online activity.
4. Configuring QoS (Quality of Service) Set up QoS rules to prioritize bandwidth for critical applications like video calls or online gaming, ensuring smoother performance.
Advanced Settings for Enhanced Security
– DNS Leak Protection: Prevent your ISP from tracking your real DNS requests by setting your router’s DNS to the VPN provider’s servers. – IKEv2 with IPsec: This combination offers strong encryption and fast reconnections, ideal for mobile users. – Port Forwarding: Forward specific ports to ensure smooth streaming or gaming performance.
FAQ: Common Questions About VPN on Routers
Q: Can I use any VPN service on my router? A: Yes, but not all VPN providers support router-based configurations. Ensure the VPN you choose offers router firmware or manual setup options. Q: How do I set up a VPN on my router if I don’t have firmware? A: If your router doesn’t have firmware, you can manually configure the VPN using the admin panel. Look for options like OpenVPN or IKEv2 and input the server details provided by your VPN service. Q: Does using a VPN on my router affect my internet speed? A: It can slightly reduce speed, especially if the VPN server is far away. However, most modern VPN services offer fast performance, and you can optimize it by choosing the closest server. Q: How do I troubleshoot a VPN connection on my router? A: Check the server address, port, and credentials for errors. Also, ensure the router is restarted and the VPN provider’s server status is online. If the issue persists, contact the provider’s support team.
Conclusion
Setting up a VPN on your router is a powerful way to secure your network-wide data and enhance your online privacy. By following the steps outlined in this guide, you can protect all devices connected to your Wi-Fi with minimal effort. Choosing the right VPN service, configuring the settings correctly, and testing the connection will ensure that your data is encrypted and your internet activity remains anonymous. Whether you’re looking to bypass geo-restrictions, secure your remote work, or protect your family’s online privacy, a router-based VPN** is an essential tool in your digital security arsenal.
Summary: This article provides a step-by-step guide on how to set up a VPN on your router, covering key aspects like choosing the right provider, configuring settings, and testing the connection. It emphasizes the benefits of network-wide security, compatibility with major router brands, and optional advanced settings for enhanced performance. The FAQ section addresses common concerns, ensuring users have a clear understanding of setup requirements and troubleshooting tips. With a router-based VPN, you can protect all devices in your network efficiently and securely**.


